If you’re reading this article, this must have happened to you at least once: You re-open a mix or recording session a few days after working on it, and the audio clips appear in gray. Pro Tools can’t find the source audio files because they are no longer in the session. It’s very frustrating. So I’m going to give you 4 ways to keep your files safe in Pro Tools.

The best ways to keep your files safe in Pro Tools are :
- Make an automatic copy when importing
- Make a manual copy in a new folder
- Consolidate clips to create new files
- Sessions backups
Before Starting
Keeping your files safe is more complex than you might think. Indeed, seeing your audio clips in the Pro Tools timeline does not mean that the files have been copied into the session.
The Pro Tools “search engine” is powerful. Indeed, even if the files are not in the “Audio files” folder created by Pro Tools when a project is opened, the system will be able to find the files located in the internal hard disk.
But does this mean that you’ll also find your audio files when working on your session a few weeks later? No! anything can happen: an involuntary deletion, a bug, a folder move,… Many things can make you lose your files.
If you want to work in a more professional way in the field of mixing, recording or music production, you will have to apply some rules that will guarantee the security of all your audio files.
That’s why I’m going to give you 4 ways to keep your files safe in Pro Tools. Are they foolproof ? Honestly, file loss can happen very quickly, but if you apply these 4 techniques to every session you open, you have a 99% chance of never losing those files.
Sure, it will take an extra minute or two in your work process. But I can guarantee you, from experience, that it is most certainly worth it.
1. Make an automatic copy when importing
This first way is the easiest and most familiar way to copy files into the Pro Tools session.
But before doing so, it is very important, for the sake of efficiency, to use the appropriate keyboard shortcuts. The Pro Tools keyboard shortcut for importing audio files is Shift + Command + I (Mac) and Shift + Ctrl + I (Windows). This will save you a few seconds on an action that you’re likely to do many times over the next few years. This is the window you should see :

When you select one or more audio tracks to import, Pro Tools will prompt you to press “Add”. Do not press this button, as it will only import the clip into the session without importing the audio data. In other words, the files will not be linked to your session folder.
What you need to do to import the audio data with your files is to click on “Copy “*. These audio files will then automatically be stored in the “Audio files” folder created by Pro Tools when the session was created.

* Note: If the sample rate or bit depth is different from the session, the “Copy” button will be replaced by “Convert”. This does not change anything for the import process. This button will also copy the audio data to the session folder.
For some reason, sometimes inexplicable, it could happen that, despite this automatic copy, Pro Tools no longer finds the parent files in the session. That’s why I’m going to give you a second technique, which will considerably increase the chances of keeping your files safe in Pro Tools.
2. Make a manual copy in a new folder
The automatic copy that Pro Tools does when you press the “Copy” or “Convert” button may not be enough. So for the past few years, I’ve gotten into the habit of copying all imported master audio files into a folder that I create manually.
As a reminder, when you create a Pro Tools session, the software automatically creates a folder where you will find :
- Pro Tools session in .ptx
- Session File Backups
- Audio Files
- WaveCache in .wfm
- Bounced Files
In this folder, I manually add a folder called “AUDIO” (but call it whatever you wish). Then I copy all the parent audio files in this new folder. But, why ?

In fact, it is simply a duplicate. No more and no less. And the more clones you have, the less chance you have of losing them in a false move.
Moreover, if you change the files in the “Audio Files” folder, you will always have access to the original audio files. This drastically increases the chances of finding everything you need if Pro Tools has to search inside the internal hard drive.
But let’s increase the chances of keeping our files safe, by a very simple action.
3. Consolidate clips to create new files
When all the audio files are imported and properly stored in the session, we can consolidate the clips. But what exactly does consolidating mean? How do we do it? And why do it? Answer now!
In Pro Tools, consolidating means creating a new audio clip with one or more audio clips from the same track.
To do this, simply select the clip or clips you want to consolidate with the shortcut Shift + Option + 3. You can of course perform this action on several tracks.
Why do you want to do this? Because consolidating clips means creating new files that will be automatically added to the audio files. Files created within a session are almost impossible to lose.
In our case, here’s how to do it quickly and efficiently :
- Organize the files in your template or session
- Create a group with all the audio tracks
- Select all of them with your cursor
- Consolidate them with Shift + Option + 3
- Your new files are created!
1. Audio files organized and grouped

2. Audio files selected

3. Audio clips consolidated under new files

You obviously don’t have to consolidate entire sessions. You can also do it on specific parts. It depends on your preferences for organizing the session. I personally like to start with whole tracks rather than several blocks on each track. It’s up to you!
4. Sessions backups
This tip is not to be applied within Pro Tools, but it is the one that could literally save your life! It’s just a matter of making a backup of your computer.
With which tool? How often? Which storage? I give you all these answers just below.
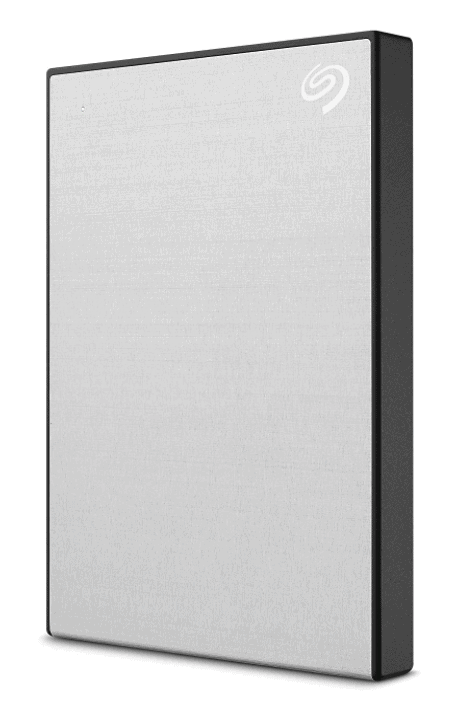
You can do this with a simple external HDD, about once a week by importing all important data. A 2TB disk will certainly be enough to start with. Afterwards, you can use a 5TB, then a 10TB, etc…
Are you a Mac user? Then I strongly advise you to reserve this external hard drive for Time Machine. This is a system created by Apple a few years ago that allows you to make a backup of all new data as soon as you connect the dedicated hard drive to your computer. The data already on the disk are not imported. As soon as the hard disk is full, the oldest data is deleted.
In short, with Time Machine, all you have to do is dedicate an external hard drive for backup, connect it once a week (or more) to your computer and let Apple do the rest of the work!
For more than two years now, I have been using the 2TB Seagate One Touch exclusively with Time Machine. And despite all the mixes I work on every year, the first deletions of older data only took place a few weeks ago. To be honest, going to search for data in this drive has saved me more than once! It’s a small investment for maybe huge valuable files in safety.

Whether it’s with Time Machine or not, making a maximum of backup and duplicating your files is never a waste of time. You can also use cloud storage systems like Google Drive or Box.
Each system has its advantages and disadvantages, but each of them will bring you maximum security (and more and more accessible storage) for your files.
In the end, the ultimate goal is to always have 2 or 3 clones of all your files. You never know what can happen.
Conclusion
Digital files are a bit like love: You don’t realize how valuable they are until you lose them. Give me a round of applause for this high quality metaphor. On a more serious note, you have to be very careful about the security of these files. A bad move can happen very quickly. And the day it does, you’ll probably be the happiest person in the world for having done the right thing in backing up your important files.
Here’s what you need to remember: Use Pro Tools’ auto-copy, create a new folder with the audio files, consolidate the clips to create new internal session files and make as many backups as possible. By doing this, and even by doing the most destructive false moves, you have a 99% chance of keeping all your files safe.
If you have any other techniques, feel free to comment on them to help the community keep their audio files safe in Pro Tools. If you have any questions about this topic or music mixing in general, contact me, I’m always happy to help!


