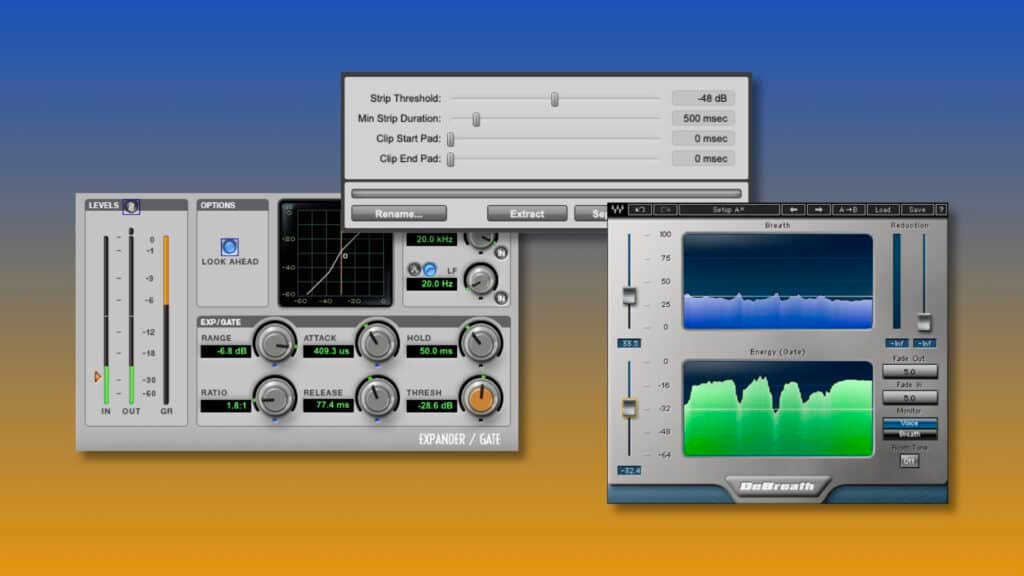
Vocal breaths can be very annoying for a quality mix. But how do you get rid of them without spending hours editing them? In this article, I’ll give you 3 techniques I use every day to clean up vocal breaths quickly and efficiently.

Before diving into anything, it is important to keep in mind that using the right tools is paramount to quality vocal cleaning. The 3 best tools for cleaning vocal breaths in Pro Tools are:
- Strip Silence
- Waves DeBreath
- Expander / Noise Gate
But first, let’s answer an important question that is often debated in the music world, regardless of the genre.
Should I always remove vocal breaths?
In music mixing, it is quite rare to completely eliminate vocal breaths. Most of the time, you will simply have to reduce them to maintain the liveliness they provide within the speech without them taking over the message.
Indeed, the breaths ensure the link between each phrase and maintain a kind of life essential to keep the attention of the listener until the end of the song.
But when would it be worthwhile to remove them completely? Well, it always depends on the song, the artistic intentions and the universe. Most of the time, you should try to feel when the breaths are necessary or not.
Also an important question: At what point should I decrease my breathing? That’s what we’ll see in the rest of this article!
Need a professional sound engineer specializing in pop and hip-hop mixing ? Great! Take a look at our services and let’s blow up your career together!
Let’s start now!
1. Strip Silence

Strip Silence is a tool native to Pro Tools that allows you to separate a sound signal according to its intensity. In concrete terms, soft sounds will be separated from loud sounds.
Using this tool is probably the most efficient way to process vocal breaths in a few clicks.
If you want learn more about Strip Silence, you can read this article: How To Use Strip Silence In Pro Tools
The first thing we’re going to do to clean up vocal breaths with Strip Silence is to duplicate the vocal lead track (you’ll understand why later).
Then, we will select one of the two tracks (not both!). If several tracks are to be cleaned with Strip Silence, I strongly advise you to clean them one by one, because this tool takes into account the whole selected signal to make the separation. You could therefore create unnecessary blocks, as we can see in the image below.

Now we can open the Strip Silence window with the keyboard shortcut Command + U (Mac) or Control + U (Windows). The goal is simple: with the 4 parameters at your disposal, you will have to try to place the white lines between the « Respirations » and « Vocals » regions.
The settings will depend a lot on the type of vocals, the dynamics and the way it was recorded, but in general, the settings will look like this:
- Threshold: Between -10 dB and -25 dB
- Min Duration: Around 500 ms or shorter
- Clip Start Pad: Between 15 ms and 50 ms
- Clip End Pad: Between 100 ms and 300ms
If you did things the right way, your « pre-cut » should look like this…

This is how we will proceed now…
On the first track (whatever track it is, it doesn’t matter much), we will click on « Strip ».
This will allow Strip Silence to remove all blocks that are below the set Threshold level.
In other words, all breaths will be removed from the selected region.
On the duplicated track, we will apply exactly the same Strip Silence settings as on the other track. But instead of clicking on Strip, we will click on Extract.
In this case, it is the signals above the threshold level that will be removed. So all the vocal signal.
So we end up with a vocal track without breaths, and a track without vocals but with breaths only. This allows us, with a single fader, to adjust the entire volume of the breaths.

Note: With this technique, it is important to select all the clips on both tracks and use the F key to add fades in and fades out to make sure you don’t get clicks when listening.
– Pros –
✅ Very precise correction
✅ 100% control
✅ Vocals and breaths can be processed in a independent way
– Cons –
❌ Long to set up
2. Waves DeBreath

DeBreath is a Waves plugin capable of capturing the breaths of a voice and adjusting their overall volume in real time. But how to use it the right way?
The first important thing to know about DeBreath is that it is a tool that separates (internally to the plugin) the processed track into two tracks: one that focuses on vocals and a second that focuses on breaths.
The goal is to adjust the threshold level (left fader) so that on the top track the breaths are above the threshold, and on the bottom track they are below the threshold. If a breath does not meet both conditions, it will not be processed by the plugin.
By default, the plugin will set the threshold to 50 for both faders, which is usually a good starting point, although it depends greatly on the gain of the recording.
When both faders are well adjusted, you can then adjust the level of breath reduction, on the right.
Generally, a gain reduction of -10 to -15 dB is ideal. But it depends, as already mentioned, on the universe, on the level of intimacy sought with the singer/rapper and also, of course, on the level of breaths.
The problem with using DeBreath is the purely automatic nature of the process. The algorithm is certainly very powerful and is able to detect and process breaths in a very natural way. But there is a chance that Waves’ tool does not detect everything, or maybe not correctly. You will have to use the manual way.
– Pros –
✅ Super quick and efficient
✅ Designed for breaths cleaning
– Cons –
❌ No manual control
3. Expander / Noise Gate

If, for some reason, the first or second technique does not suit you, you can use a Noise Gate / Expander.
As a reminder, an expander is a tool that increases the dynamics of an audio signal. Generally, levels below a certain threshold are lowered at the output (dynamic range increase). When this level decrease is infinite, we talk about Noise Gate: signals below this threshold will be cut.
As we know that the level of the vocal breaths is generally lower than the vocals themselves, we can use this principle so that the general level of the breaths is reduced.
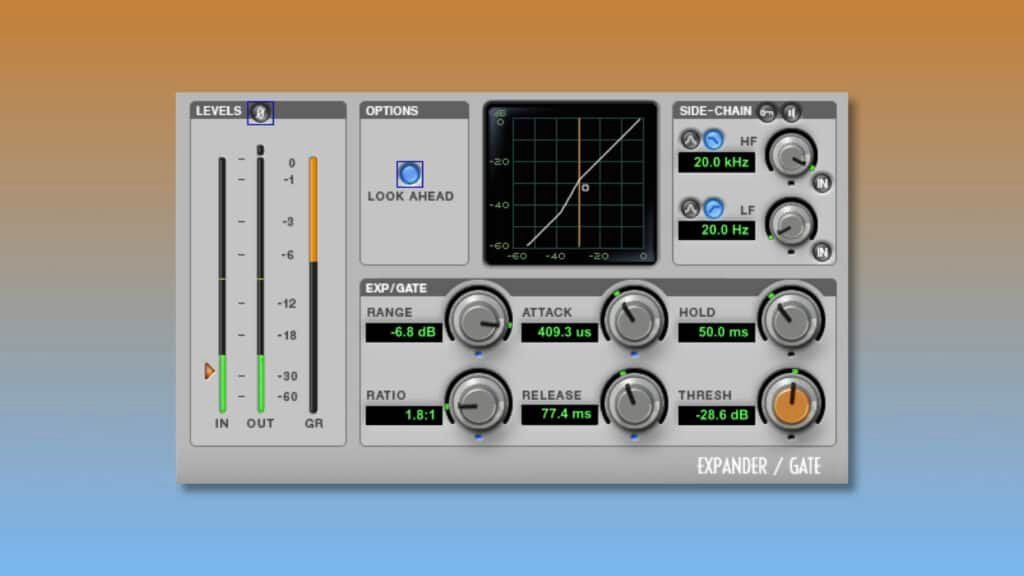
The first thing to do is to adjust the threshold level. It should not be too low so as not to leave the breaths at their initial level. But not too high either, so as not to reduce the level of the voice signal unintentionally. If the gain of the vocals is relatively correct, the threshold should be between -20 dB and -30 dB. Don’t forget to trust your ears!
The ratio should be soft enough to avoid extreme level jumps. It will usually be between 1.5:1 and 2:1. Generally, the louder the breaths, the higher the ratio.
Attack time should then be adjusted. We will generally be between 1ms and 5ms. The shorter the attack time, the more likely it is that it will create the appearance of clicks, while the longer it is, the more likely it is that it will prevent certain important transients from being properly reproduced.
For the release time, the values are quite different. It will be necessary to choose values that let the end of words and sentences live as much as possible. The usual values are between 60ms and 150ms.

On the picture above you can see that 2 parameters that have not been described appear: Range and Hold.
The Range parameter is the level below which the ratio reverts to its original 1:1 ratio. It is relative to the threshold level. It allows you to give a certain limit to the dynamic correction applied to the signal. In the case of vocal breaths, I advise you to stay below -10 dB. It is indeed useless to go lower.
The Hold parameter determines how long it takes for the Expander to start returning to its original 1:1 ratio. If you are not familiar with this tool, you should not make life too complicated with this Hold parameter. Leaving it at around 50ms is ideal.
– Pros –
✅ Relatively quick to setup
✅ Many adjustable parameters
– Cons –
❌ Unaccurate processing
❌ Not natural
Need a professional sound engineer specializing in pop and hip-hop mixing ? Great! Take a look at our services and let’s blow up your career together!
Let’s start now!
Conclusion
In music mixing, there are many different ways to clean up vocal breaths. Some are faster and more efficient, others more precise. It depends on what you are looking for. In my opinion, the first technique (Strip Silence) is still the most efficient and accurate in Pro Tools. Moreover, it is possible to go back to it manually if the tool leaves some defects in the correction. It looks extremely long to set up, but when you do it every day, it’s super fast!
It’s up to you to listen and compare. It will make your music mixing experience grow!
Make sure to contact me if you have any questions about breaths cleaning or anything in the field of music mixing, I’m always happy to help!
My favorite tools for mixing pop and hip-hop music:
Plugins
In the field of auto-tune, I’m convinced that nothing’s better and more efficient than Antares Auto-Tune Pro. As for the EQ’s, FabFilter Pro-Q3 and Slate Digital Infinity EQ are, in my opinion, the best tools. For compression, I have 2 favorites plugins: Waves RComp and UAD EL8 Distressor.
As for reverb, I’m a big fan of the Soundtoys Little Plate, but generally, I go for the Valhalla VintageVerb for its versatility. I also love the Arturia Rev PLATE-140 and the UAD Pure Plate for its organic side.
Headphones
The closed headphones I love and will always love using for mixing pop and hip-hop music are the Beyerdynamic DT-770. As for the best open-back headphones, I use the Sennheiser HD600 headphones, and I’m really happy of them!
Monitors
Having a pair of Yamaha HS7 in its studio or home studio is always cool for more excitement while listening to your mixes. The Adam Audio T7V monitors are also super accurate. In my studio, I also have a pair of Genelec 8030 for their reliability.
Hardware gear
For anyone who wants to start using hardware in their mixes, I always recommend these 2 units from Klark Teknik: the EQP-KT and the 76-KT. Don’t forget to use good converters, such as the Apollo interfaces. This is essential for a good rendering.


