If you are involved in music mixing in any way, you have probably already heard that it is better to use reverb in auxiliary and not in insert. But why is this technique preferable? And how do you set it up and use it properly?
The main reason why it is preferable to use reverb in auxiliary is because it allows you to have a completely independent control of the reverb and the dry audio source. This means that the balance between the direct source and the reverb can be changed during the song with ease and efficiency.
Before diving into the heart of the matter, I’d like to point out that if this technique is favored, it’s certainly not to annoy you, it’s to help the final product. Sure, it will take longer to set up than using reverb as an insert, but if you want to get to the bottom of things in your mixing process, you’ll get stuck in quickly.
And besides the why, it’s also important to know how to use the aux principle in the right way. I’ll explain all that in the rest of this article!
Need a professional sound engineer specializing in pop and hip-hop mixing ? Great! Take a look at our services and let’s blow up your career together!
Let’s start now!
What is an auxiliary track?
In audio, an auxiliary track is a track that has no audio associated with it, but which allows one or more audio signals to be routed in.
This type of track does not record audio. The incoming signal simply passes through and can be sent to the output, wherever you want in your DAW or to physical output.
Auxiliary tracks are often used to send the signal of several types of audio track (e.g. drum group or guitar group), for parallel compression or, in our case, with effects like reverbs and delays.
The principle of auxiliary may seem difficult to understand, but once you understand the principle, many new doors will open in your learning process in music mixing.
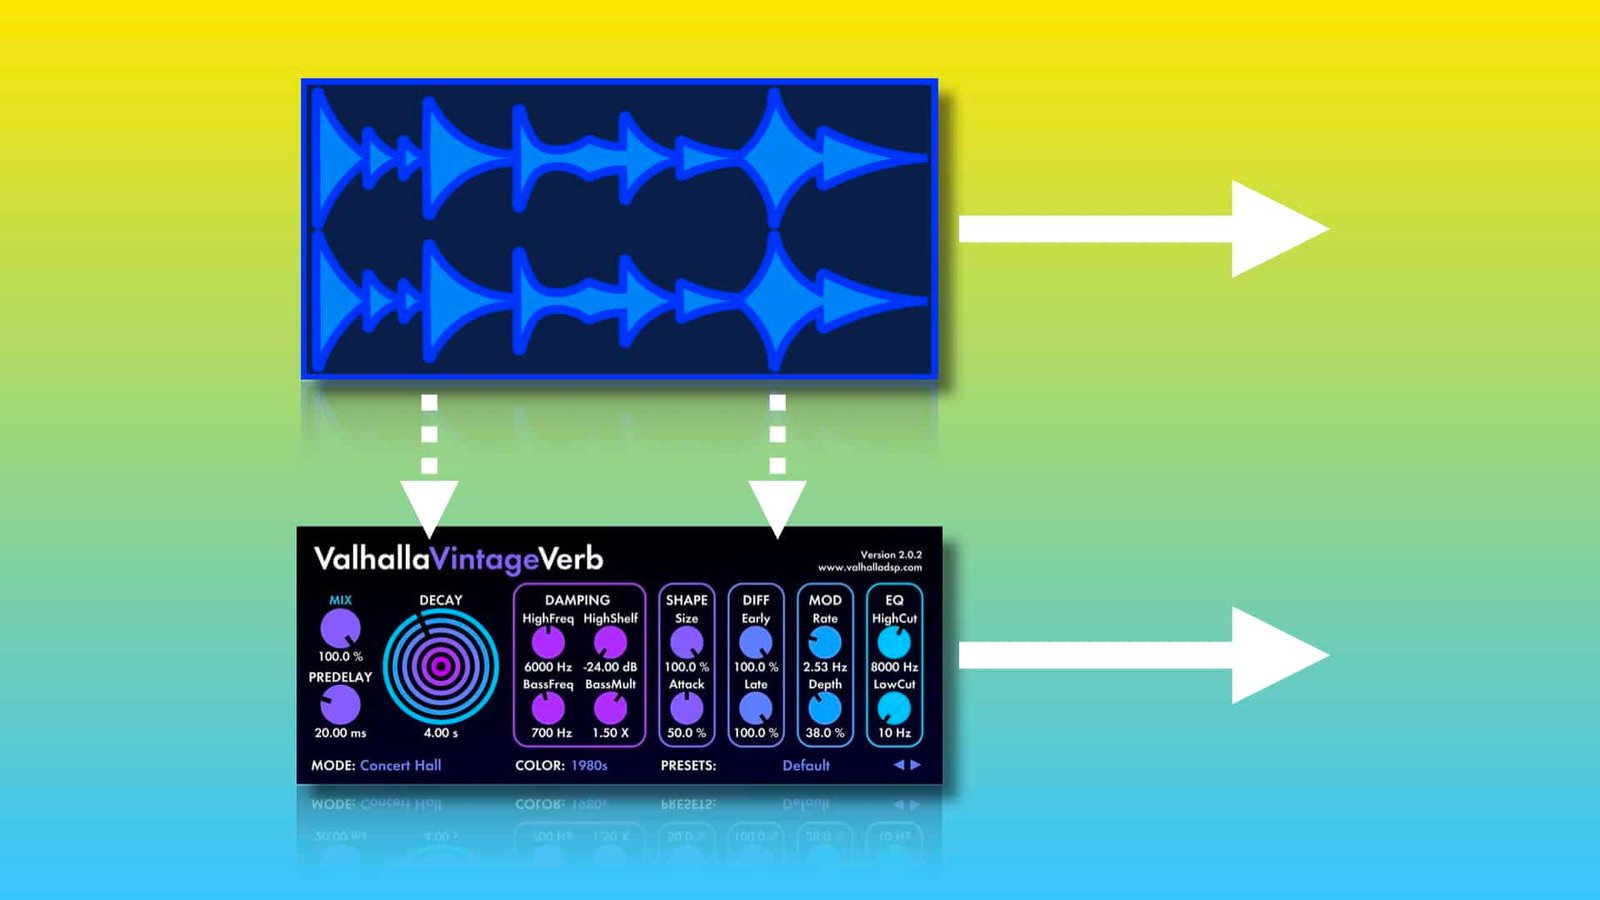
Here is a simple diagram that illustrates the use of the auxiliary principle with a reverb. The goal (in our example) is to have:
- The dry signal on a track
- The reverb that comes from that same signal (100% wet) on the other track


How to use a reverb in auxiliary?
You may have already understood a lot about the auxiliary principle from the diagram above. Or maybe you already know how to use a reverb as an auxiliary. But in both cases, I think it’s important to make a detailed and structured reminder of how to use this principle in the right way.
This will allow you to better understand the explanation of « why » it is essential to use reverb in auxiliary and not in insert.
Here we go!
A. Create your auxiliary track
The first thing you will have to do is to create a stereo auxiliary track (unless you want it in mono, but this is rare). This track will be used exclusively to play the reverb of the track to which you want to add the effect.
If you use Pro Tools, the keyboard shortcut to create a new track is Shift + Command + N (Mac) or Shift + Ctrl + N (Windows). All you have to do is select the number of channels (mono or stereo) and the type of track.
I advise you to name it directly. This is a general advice in music mixing that will allow you to be more organized and therefore more efficient.

B. Link the two tracks through a bus
Now that we have created our auxiliary track, we need to find a way to link our audio track to our auxiliary track. To do this, we’ll use a bus, a sort of internal path in the DAW. For this example, let’s say we use bus 11-12.
At the input of your auxiliary track, select bus 11-12. This means that from now on, everything that is sent to the 11-12 bus will go through this auxiliary track AND its processing.
All we have to do then is to send our signal to this auxiliary via a send bus.
Note: This is not an output bus, but a send bus, which means that we will send our signal directly to the main output AND through our auxiliary track.

C. Add a reverb in the auxiliary track
Our signal is now sent in parallel to our stereo auxiliary track. All we have to do to make the auxiliary track handle only the 100% wet signal (reverb) is to add a reverb to this track and set the mix knob to 100%.

D. Use the send fader to adjust the balance

Thanks to the send fader of bus 11-12, you can adjust the reverb level you want throughout the song, without changing the direct signal level.
There you go, you now know perfectly well how to use a reverb as an auxiliary. It may seem like a long and tedious process, but it only takes a few times to get used to it and you can do it in less than 30 seconds.
ℹ️ Do you want to learn how to use reverb on vocals? Complete answer right here: How To Use Reverb On Vocals – The Pro Guide
Why use a reverb in auxiliary?
But behind all this process remains a crucial question: Why use reverb in auxiliary?
Here are the main reasons why it is essential to use reverb as an auxiliary:
1. You have total control over the balance

The big problem with using a reverb as an insert and not as an auxiliary is that the volume of the dry signal has a direct relationship with the volume of the wet signal. When one goes louder, the other will go quieter, and vice versa.
This can become a real headache when it comes to volume automation, which happens very often in modern music mixing.
By using the reverb as an auxiliary, you will never encounter this problem. Since the volume of the dry signal will be managed directly by the volume fader. And the volume of the reverb can be adjusted either by the send fader or by the volume fader of the auxiliary track (return fader). The control is total.
The balance between the two signals can therefore be constantly adjusted during the song with ease.
2. You can send multiple audio signals to it
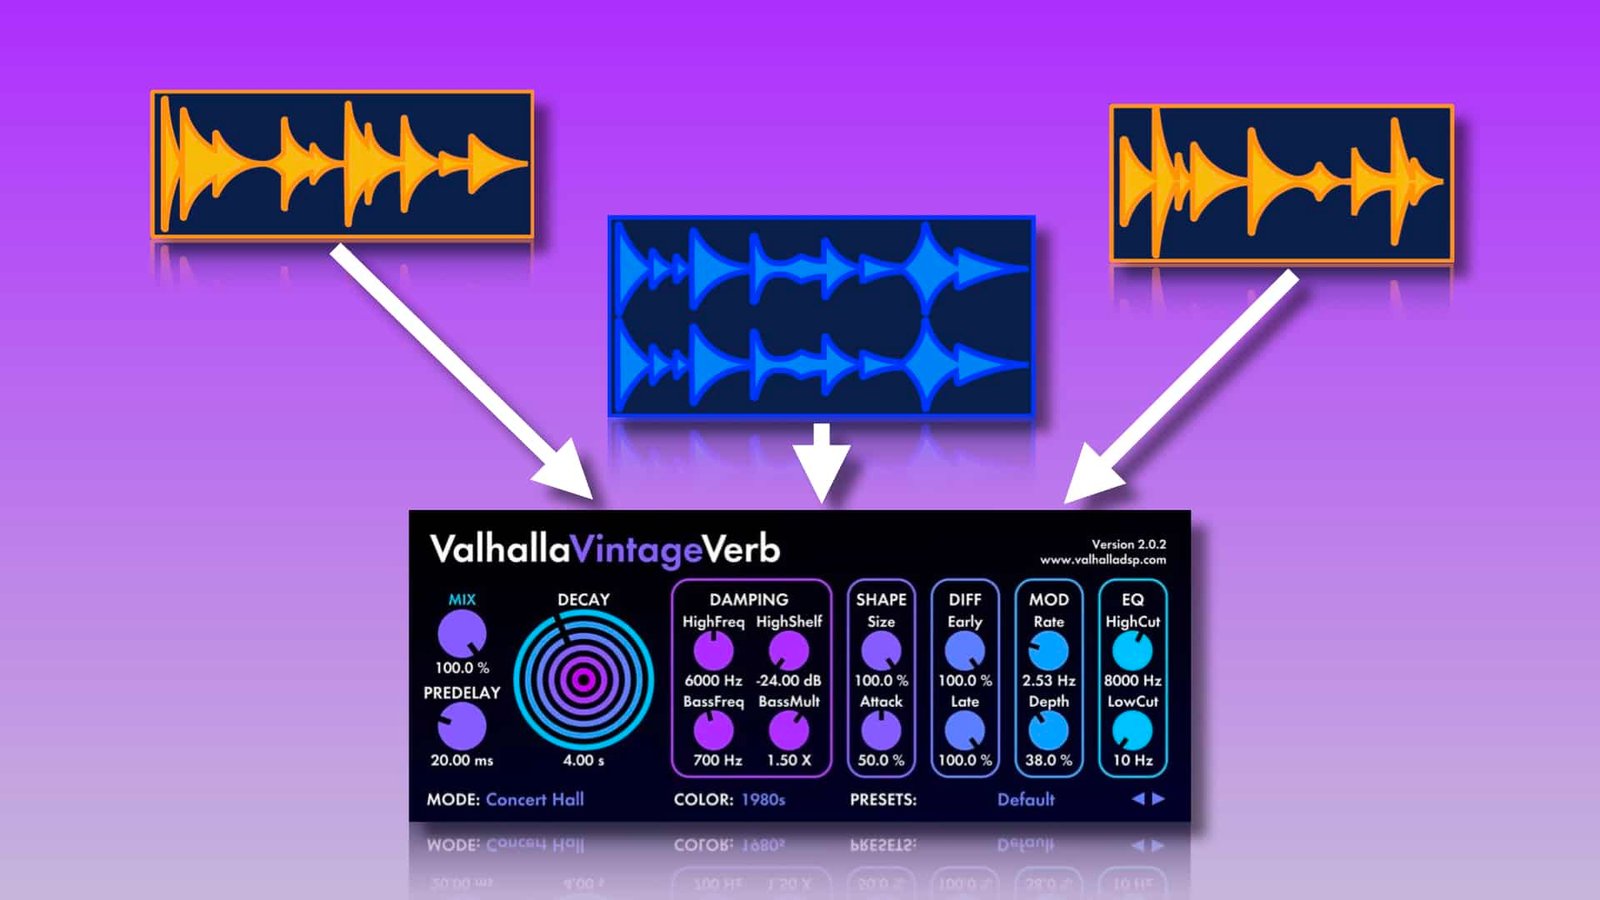
As I told you earlier in this article, several signals can be sent in the same auxiliary track. And again, all send and return levels of the reverb can be managed independently. Very convenient!
This often happens when it is necessary for the song to place several sources in the same « environment ». One can then choose to put a 100% wet room in an aux track and send all the necessary tracks in parallel, adjusting the send level of each track.
This opens a lot of doors for creativity.

3. You can process the reverb independently

Let’s take a simple example: In the song you are mixing, you would like to add the frequency spectrum of the reverb of the vocals and add a slight chorus without changing the tone and timbre of the vocals.
With a reverb insert, it would simply be impossible to do this, because the tone of the vocals would be changed. This is not what we are looking for.
But by using the reverb as an auxiliary, all you have to do is add all the necessary processing tools to the auxiliary track dedicated to the reverb, and you’re done!
This also allows you to stay structured and organized in your session.
4. You save a lot of time

Even though it may seem very time consuming to set up a reverb as an auxiliary, you save a lot of time over an entire session. Indeed, for the reasons mentioned above, the minutes you save are clearly in the tens.
The advantage of using your reverbs (and effects in general) as an aux is twofold:
- First of all you save a lot of time
- And secondly, your session and your mind will be much more structured.
The final quality of your mixes is bound to increase, believe me!
ℹ️ Being able to mix the use of delay and reverb in music mixing is essential! Here is a guide that will help you greatly: How To Blend Reverb And Delay With Rap Vocals
Do I always have to use Reverb in auxiliary?
To every rule, there are exceptions. No, it is not always necessary to use reverb in auxiliary. In some situations, it will be more practical to use the reverb in insert, for purely practical reasons.
For example, I often use insert reverbs with pad synths to quickly create a sound world without complexity.
This kind of situation also happens a lot with guitar recordings. Indeed, if it goes through effects pedals (a reverb for example), it will be recorded in the same track as the dry signal.
In fact, in general, you can use a reverb as an insert if you don’t need to change the balance between the dry and wet signals during the song. But of course you have to be sure before making this choice.
With experience, you will quickly be able to determine the ideal situations for use as an auxiliary or insert.
If, in any situation, you hesitate for a long time between auxiliary or insert, I strongly advise you to choose the auxiliary principle. This system will always make your job easier as you mix.
Need a professional sound engineer specializing in pop and hip-hop mixing ? Great! Take a look at our services and let’s blow up your career together!
Let’s start now!
Conclusion
Even though using reverb as an auxiliary may seem time consuming to use and set up, it allows you to do two main things: Keep a structured/organized session and save time.
Using this principle allows you to keep full control over each of your mix elements. And therefore increase the quality of your mixes. You will quickly see the difference in quality.
If you have any questions about mixing or about anything in the field of music mixing, please contact me, I’m always happy to help!
Related Articles:
My favorite tools for mixing pop and hip-hop music:
Plugins
In the field of auto-tune, I’m convinced that nothing’s better and more efficient than Antares Auto-Tune Pro. As for the EQ’s, FabFilter Pro-Q3 and Slate Digital Infinity EQ are, in my opinion, the best tools. For compression, I have 2 favorites plugins: Waves RComp and UAD EL8 Distressor.
As for reverb, I’m a big fan of the Soundtoys Little Plate, but generally, I go for the Valhalla VintageVerb for its versatility. I also love the Arturia Rev PLATE-140 and the UAD Pure Plate for its organic side.
Headphones
The closed headphones I love and will always love using for mixing pop and hip-hop music are the Beyerdynamic DT-770. As for the best open-back headphones, I use the Sennheiser HD600 headphones, and I’m really happy of them!
Monitors
Having a pair of Yamaha HS7 in its studio or home studio is always cool for more excitement while listening to your mixes. The Adam Audio T7V monitors are also super accurate. In my studio, I also have a pair of Genelec 8030 for their reliability.
Hardware gear
For anyone who wants to start using hardware in their mixes, I always recommend these 2 units from Klark Teknik: the EQP-KT and the 76-KT. Don’t forget to use good converters, such as the Apollo interfaces. This is essential for a good rendering.


