Being dissatisfied with the quality of your mixes, which might sound very amateur, can lead to a lot of frustration, especially when you don’t know what the problem is. What will help you is to have a list that you can refer to to identify the problem(s) in your mixes. Identify, then solve. That’s the secret to good learning!

The top 10 reasons why your mixes (might) sound amateur are :
- Wrong balance
- No use of reference
- Bad reverb control
- Lack of punch
- Bad acoustic treatment
- Inconsistent levels
- Overthought mixing process
- Lack of clarity
- Bad organization
- Not enough confidence in the learning process
It is essential to mention that this article is not meant to focus on the technical side of mixing, but rather on the relatively simple things that make a mix sound amateurish.
This is not to say that music mixing is a quick and easy thing to learn, but that the technical aspect is not always the problem.
One should never forget that the ultimate goal of mixing is to bring out the emotion of the song. Not to use expensive EQ’s and compressors to sound professional. People want to feel the song and be in the artist’s universe. Here are the elements that will help you achieve this…
Need a professional sound engineer specializing in pop and hip-hop mixing ? Great! Take a look at our services and let’s blow up your career together!
Let’s start now!
1. Wrong balance
Before you start anything more complex in your mixing process, it is imperative that your balance is good. In my opinion, a good balance constitutes 30% of a good mix.
If you skip this step, you can use the best tools in the world, your final mix will not be good. Because the balance and harmony between the elements of a song is the basis of the listener’s attention. But how do you know if your balance is right?
Let’s take a very simple example: vocals on an instrumental. In this very simple case, the level of the instrumental will be the reference. The game is simple, by setting the vocals volume fader to -∞, you will start by playing the instrumental. Then, slowly, you will increase the volume of the vocals until you feel that the balance between instrumental and vocals is correct. As you do this, don’t look at the screen, it might trap you in your process.
In order to keep the ratio between all the elements the same throughout the song, you will obviously need to keep the volume of each sound source more or less the same. So you have to pay attention to the gain of each source. The compressor can also be a very good tool, we will talk about it later.
Example
Let’s illustrate this principle with 2 audio clips. Both are not mixed. We just want to focus on the balance between the vocals and the instrumental:
1
2
Song: MehLinium – The Message (feat. Bronze Nazareth)
The first one is a very good start, as the balance between the vocals and the instrumental is good. The listening experience is pleasant even without any processing tools. But the second one is a very bad start, the level of the vocals are too low.
2. No use of reference
I’ll be honest with you. If I had to pick one ultimate piece of advice out of all the ones I give in this article, this is the one I would take. Without hesitation.
Using reference tracks is the best way to learn and train your ears in audio mixing. Indeed, having a direct comparison of your mixes with pro references allows you to recalibrate your ear in a very short time and get it used to listening to professional material.
Many people never implement this in their music mixing process. Two reasons stand out:
- The first reason is simply that some people find it unnecessary. This is not true. The ear needs to be calibrated on sound references to work properly.
- The second one is a kind of fear that some people have of comparing their music to professional stuff. But, honestly, you shouldn’t be afraid to compare yourself to super-pro, the better the references, the faster the learning curve.
For optimal quality references, it is important not to listen to them directly on streaming platforms, which are actually only compressed files, but on CD reference. CD quality is the best audio quality you can get from a track, because the digital information on it is not compressed.
If you have the possibility, I advise you to create a short compilation of 3 minutes with some references. These are usually songs that you know well and whose frequency spectrum you recognize very quickly. You can use that compilation before each mixing session. You should obviously adapt it to the style in which you work and change it a few times a year to diversify your reference source.
Example
Here is my own compilation, which I listen to every day before I start mixing. This compilation is adapted to the style and the field in which I work: vocal mixing in hip-hop and pop music.
Note: I advise you not to download this compilation. First of all because it is a 320 kbps mp3 file, which is a lossy file type. And secondly because my compilation might not be suitable for your needs.
3. Bad reverb control
In music mixing, reverb is probably the hardest element to learn and master. There are often many mistakes in this area in amateur mixes. And unfortunately, this kind of mistake is not forgivable.
Indeed, a small error of reverb can very quickly make a mix of production to completely amateur. It is wrong to think that the more reverb you add, the more « united » and « harmonious » the mix will sound.
Always keep in mind that too much reverb can mask a lot of detail in a track. So you have to use it sparingly.
If you feel like your mixes lack detail and even sound « muddy », that’s probably where the problem comes from. But what can you do about it?
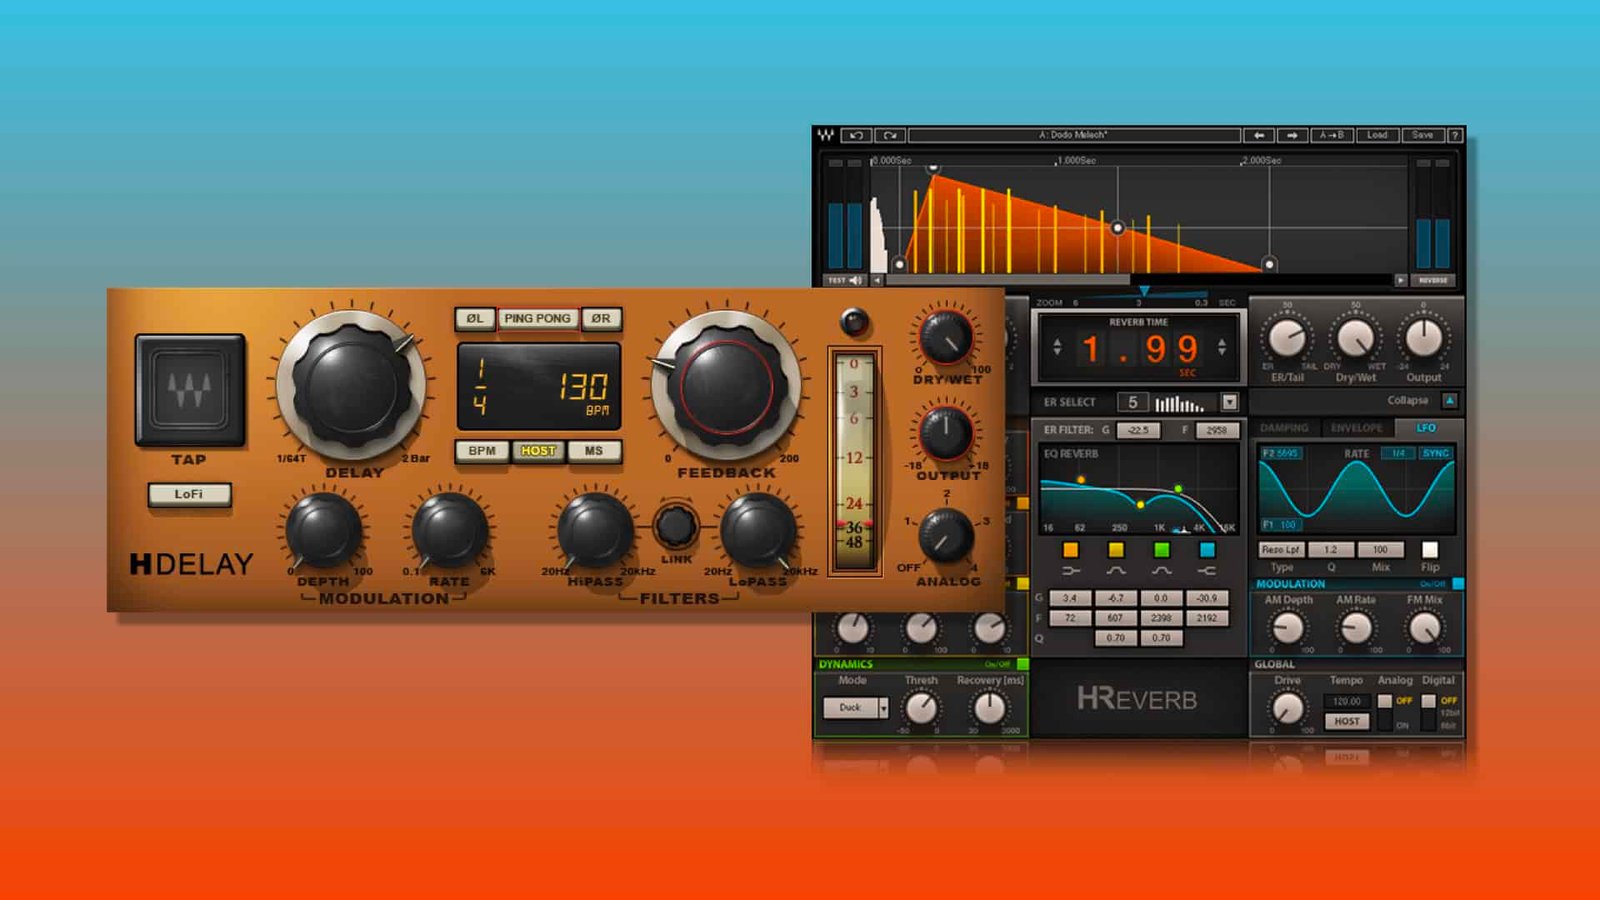
First of all, you have to respect the golden rule of music mixing: use the reverb as an auxiliary, not as an insert. This will allow you to have full control over your reverb by not modifying the direct (dry) signal.
If you want to learn more about how to use reverb with vocals, you can read this article: How To Blend Reverb And Delay With Rap Vocals
If you are already using your reverb as an auxiliary and the problem seems to persist, I advise you to simply reduce:
- The send level to your reverb
- The reverb time
- High frequencies (filter them slightly)
This should solve some problems and/or perhaps make you aware of some problems you were not conscious of.
Example:
Here are two audio clips. In the first one, the balance between effects (reverb and delay) is clearly not good. The effects take over the direct signal and do not allow a comfortable listening. The second one is much better in terms of balance.
Wrong Vocals – Effects Balance
Good Vocals – Effects Balance
Song: Elzy James – Pb&J
4. Lack of punch
Some mixes can sometimes seem very « flat », without relief and without any kind of punch. This can make the track very unexciting and therefore… boring! Several typical cases can occur:
A. Excess sub-bass
Too much sub-bass can sometimes completely mask the audible spectrum of the human ear. It can also, when mastering, act as a kind of parallel compressor on the whole spectrum. This is the typical case, in hip-hop, of a badly dosed 808 that lowers the volume of the vocals when it hits the limiter too hard.
It’s a fact: people like powerful bass. Some genres like rap even push for a boost over the classic music spectrum. But sub-bass is like salt, you can’t overdo it!
B. Wrong compressor settings
Generally, when a beginner sound engineer or musician starts to understand the principle of compressors, the first reflexes are often the following: choose ultra short attack and release times to be sure that no transient produces clipping. This is a bad vision of things.
It is important to understand that behind the first principle of a compressor, which is to reduce the dynamics, there is a principle that every self-respecting sound engineer applies: to give more life, punch, warmth and aggressiveness to the processed source.

You should therefore always adjust the parameters of your compressors according to the type of audio source being processed. And if you don’t know at all which direction to go in, I advise you to take a look at the presets that some manufacturers like Waves or Slate Digital provide with their plugins. It can completely change your vision of music mixing!
Do you want to learn more about how to use compressors with vocals? Then I advise you to read this article: What Is An Audio Compressor ? How To Use It With Vocals ?
C. No Mix Bus processing
Adding frequency or dynamics processing to the mix bus is not a crime! You can add plugins to your entire mix without mastering.
In our case, if the mix lacks punch, there is a universal solution: add a VCA compressor. Indeed, these compressors are designed to be used on mix busses and add punch.
The best known are the SSL 500-series and the API-2500. They have been used on some of the biggest hits in music history. The hardware versions are very expensive but, good news, many digital emulations are available at more than affordable prices.
The use of VCA compressors must remain relatively subtle and light. Indeed, we will generally not exceed a gain reduction of more than 4dB (except in special cases). Here are the recommended values…
- Relatively slow attack time to let the transients come out (from 8ms to 25ms).
- Release time fast enough to accentuate the punch (Between 1ms and 3ms
- Low ratio (between 2:1 and 4:1) to let the compressor act in a transparent way.
- The threshold will be adjusted so as not to exceed a gain reduction of 3 to 4 dB. Trust your ears!
With this kind of value and by adjusting the makeup gain correctly, you should get a slightly more powerful mix. It’s these kinds of details that make a mix go from amateur to pro!
Need a professional sound engineer specializing in pop and hip-hop mixing ? Great! Take a look at our services and let’s blow up your career together!
Let’s start now!
Example:
In this audio example, we can clearly hear a difference between the first and the second audio clip. Indeed, the second one is more powerful in the low-end range but also more open in the high-end range.
Without Mix Bus Processing
With Mix Bus Processing
Instrumental by @mahzbeats
The processing was quite simple:
- Slate Digital Fresh Air
- VCA compressor
- Harmonic enhancement
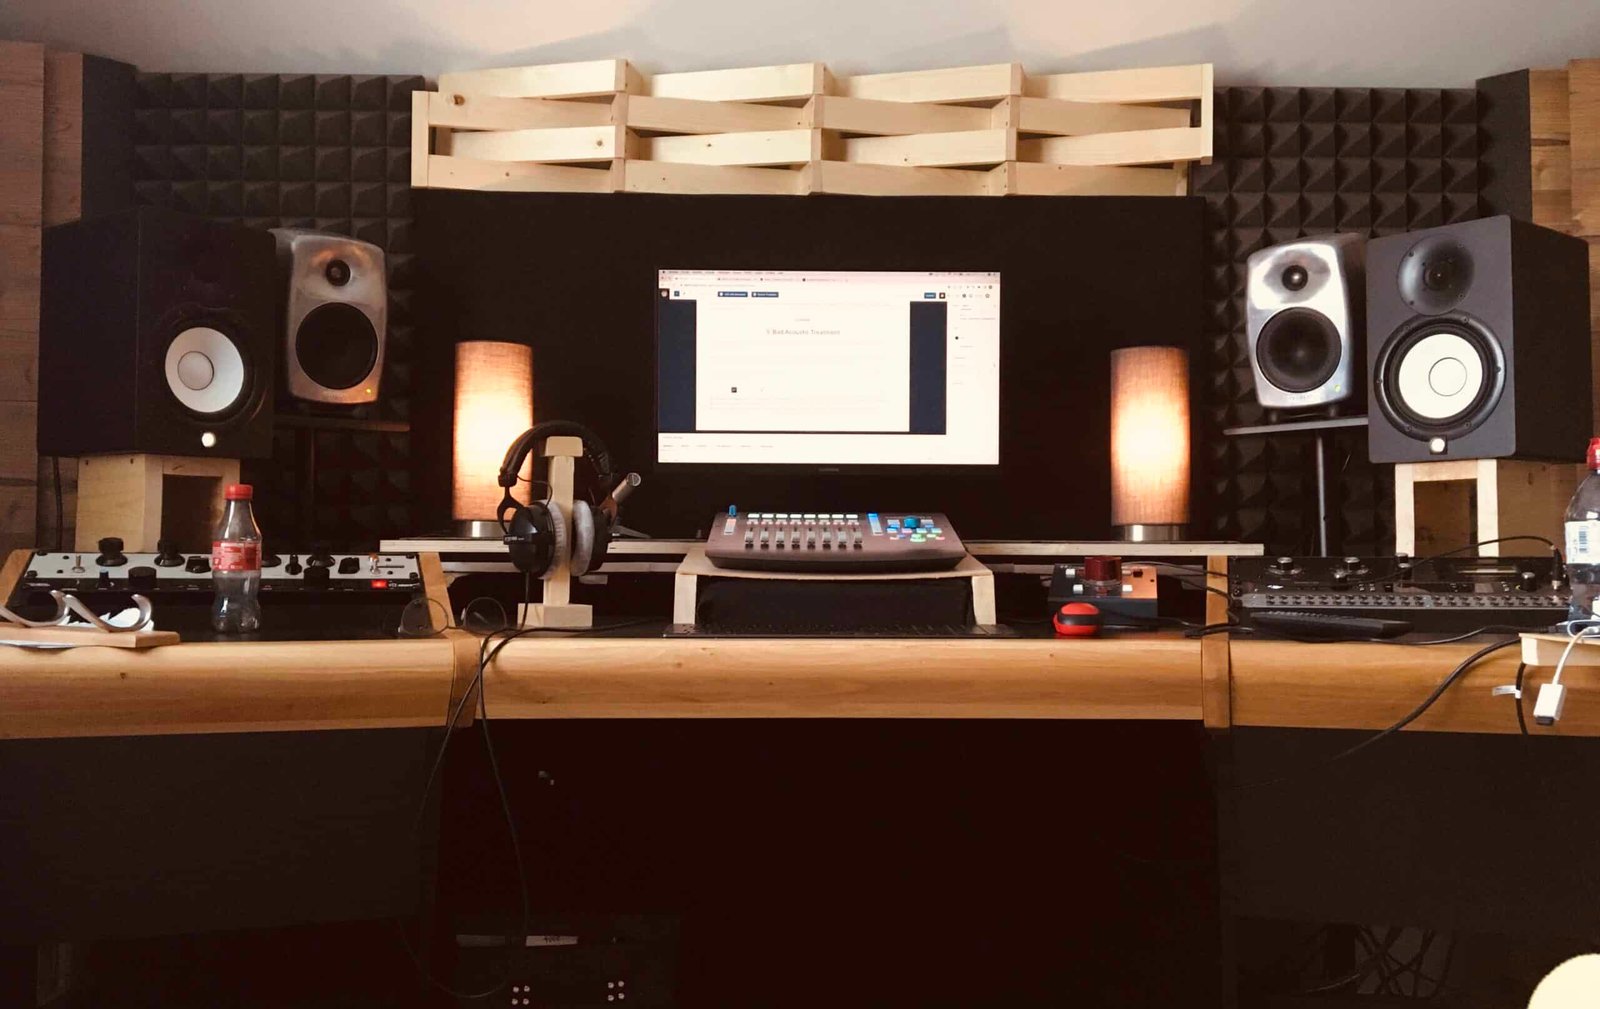
5. Bad acoustic treatment
Far too many people starting out in the music production business think that getting quality monitoring speakers is enough to get professional listening, but honestly, it’s not!
Before you even think about buying professional monitors, the first thing you need to consider is the acoustic treatment of your room. If a level of importance had to be established, I would give 40% to the speakers and 60% to the acoustic treatment. It is so important!
But where do you start when you know nothing? Well, I advise you to read carefully this article which will explain you step by step the basics of acoustic treatment in home studio.
If you don’t want to complicate your life too much and get straight to the point in your acoustic treatment, here are the two golden rules to follow:
- At the back of your speakers and on the side walls, place absorbers to prevent reflections from interfering with the direct signal (the one coming directly from the speakers to your ears)
- Place acoustic diffusers behind your back to bring the room’s acoustics to life and not muffle the frequency spectrum that reaches your ears.
But this is only theoretical and very very summary. The acoustic treatment of a studio must be adapted to each room according to the needs.
6. Inconsistent levels
If you remember, I talked earlier in this article about the importance of the balance for a quality mix. But what can completely break this balance is the variation of level during the song. Several techniques exist to counter this problem.
A. Gain Staging
The gain staging is ultra important in music mixing. Without going into too much detail, it allows you to attack the output but also the insert processing at an ideal level: not too strong so as not to clip, not too weak so as not to blend in the background noise.
If we take this principle and place it in the context of a musical mix in a DAW, we will have to cut certain clip regions to either increase or decrease them, as we can see in these two pictures.
No gain staging:

With gain staging:

The level of our audio signal will be much more constant to attack all the downstream processing!
B. Volume Automation
Having a good gain staging and using good compressors to reduce the dynamic range is not always enough to keep a good balance throughout a song.
It is very often necessary to adjust and vary the output level of each track. In other words, use volume automation. But in fact, what is the difference between volume and gain.
To make a long story short, all the gain stuff happens before the track processing. Everything to do with volume is after. If you want to progress in music mixing, it is essential to understand this difference.
Unfortunately, I don’t have any articles (yet) that talk about this subject. Here is a video that could help you a lot:
7. Overthought mixing process
When you understand how music mixing works, you can quickly realize that often the process is relatively simple and certainly does not need to be overthought!
In fact, when you are mixing any element, you should always ask yourself the question « Why? Why would you boost this or that frequency zone? Why would you compress more or less? Why choose this reverb and not another?
By doing this for each step of your process, you will see that you will learn a lot about music mixing in a very natural way. It will also completely simplify the audio processing of each track.
In fact, if you feel like you don’t have enough insert slots in some tracks when you’re mixing, you’re probably overthinking your mix.
A few simple techniques can be implemented in your workflow to solve this problem:
- 1 action = 1 « Why? »
- Set up simple and sober templates
- Think structure
For example, in my templates (which focus on vocal mixing in hip-hop and pop music) I have a vocal chain (plugins placed in a certain order) that I always follow very closely. It helps to stay structured and methodical. If you want to know more about this topic, I suggest you read this article: Crafting A Pop Vocal Chain: The Pro Guide
8. Lack of clarity
The frequency spectrum is probably the element that most differentiates an amateur mix from a pro mix. And the problem is very often in the clarity of the track.
By the way, what do we mean by clarity? In fact, this word can mean several things…
A. In terms of frequency
When talking about frequency spectrum, clarity is about everything in the high-end range. Many engineers use this term for the area between 4kHz and 8kHz, but I think it’s just as appropriate for the frequency range above that, which is also called the air zone.
This frequency range, in amateur mixes, is very often left out. And yet, it is this zone that often makes the difference between amateur and pro.
The reason is that this frequency range is difficult to master. Indeed, it can quickly become aggressive, but on the other hand, it can completely blur the message.
My advice is simple: deepen your knowledge of De-esser.
If you want to know more about it, I advise you to read this article: What Is A De-Esser ?
B. In pure terms of mixing elements
Having a good balance is a good thing. Having a good overall frequency spectrum is a very good thing too. But it is also necessary to combine the two: the spectrum of each source cannot conflict with the others, or at least not in a too extreme way.
That’s why it’s important to sometimes listen to a few solo tracks to compare their frequency spectrum and make sure they don’t conflict too much.
It is generally in the low-mid range that one should be very attentive, between 150 Hz and 500 Hz. This is where big frequency conflicts can occur. But this is not the only area, the one between 1 kHz and 2 kHz is also sometimes a source of frequency conflicts.
Compare and don’t hesitate to do some extreme boosts and cuts to hear the result and decide afterwards.
Need a professional sound engineer specializing in pop and hip-hop mixing ? Great! Take a look at our services and let’s blow up your career together!
Let’s start now!
9. Bad organization
Whether it’s mixing or not, being organized is the basis of any quality work. It allows you to think clearly and make your mind work more efficiently.
Here are some tips you can incorporate into your process to stay as organized as possible:
A. Use templates
Templates are the best way to start a music mixing session in a 100% organized way. Indeed, templates allow you to save time by setting up automatically what would take several minutes (or more) to set up manually.
But it is important to keep in mind that each template must be adapted to the needs of each person. That’s why I advise you to create your own template that will reflect your needs and habits, not the ones found online.
Of course, you can be inspired by them, but in my opinion, using templates sold online is like adapting to someone else’s system and therefore putting obstacles in your mind.
Try to identify all the actions you repeat during each music mix session and insert them in your template. Don’t hesitate to vary it over time!
B. Colors
The brain likes to be guided by visual elements. In mixing and in a DAW, the best way to help yourself with visual elements is to add colors.
Generally, colors will be used to separate track types. Typically vocals, drums, bass, melodic instruments,… Each will have its own color.
It is also very interesting to use shades of color to differentiate subtypes of tracks. For example main vocals, backing vocals and ad libs,… The easier it is to guide the eye, the smoother the process will be.

C. One task at a time!
Some people want to do 100 tasks at once all the time. The problem with wanting to do everything at once is that you do each task at 50%. Audio mixing is a field that requires precision.
It is therefore essential to go step by step in the music mixing process. Sure, it may feel like you’re moving slower (sometimes it will), but at least you’re making sure you finish each task at 100%.
As you go through your learning process, feel free to build a sort of progress template that will summarize how you proceed for each mixing session.
10. Not enough confidence in the learning process
Learning to master music mixing is a process that takes time. A lot of time. It’s not measured in weeks or months, but in years. This may seem demotivating, but you have to trust the process to move forward efficiently.
If you really have the motivation to make your music mixing skills premium quality for future clients, you’ll get there for sure. But certainly not tomorrow or next week.
The ingredients are simple: Patience and hard work combined with a structured mindset.
Conclusion
Here we go! You now have 9 points you can work on to stop making your mixes sound amateurish. Some of them will take very little time to set up, others a bit more. But the most important thing is to focus on these 9 points to speed up the process!
Don’t hesitate to come back to this article if you forgot any of these points. Honestly, each point is essential to avoid amateur results.
Please contact me if you have any question about that topic or anything in the field of music mixing, I’m always very happy to help my visitors!
Related articles:
My favorite tools for mixing pop and hip-hop music:
Plugins
In the field of auto-tune, I’m convinced that nothing’s better and more efficient than Antares Auto-Tune Pro. As for the EQ’s, FabFilter Pro-Q3 and Slate Digital Infinity EQ are, in my opinion, the best tools. For compression, I have 2 favorites plugins: Waves RComp and UAD EL8 Distressor.
As for reverb, I’m a big fan of the Soundtoys Little Plate, but generally, I go for the Valhalla VintageVerb for its versatility. I also love the Arturia Rev PLATE-140 and the UAD Pure Plate for its organic side.
Headphones
The closed headphones I love and will always love using for mixing pop and hip-hop music are the Beyerdynamic DT-770. As for the best open-back headphones, I use the Sennheiser HD600 headphones, and I’m really happy of them!
Monitors
Having a pair of Yamaha HS7 in its studio or home studio is always cool for more excitement while listening to your mixes. The Adam Audio T7V monitors are also super accurate. In my studio, I also have a pair of Genelec 8030 for their reliability.
Hardware gear
For anyone who wants to start using hardware in their mixes, I always recommend these 2 units from Klark Teknik: the EQP-KT and the 76-KT. Don’t forget to use good converters, such as the Apollo interfaces. This is essential for a good rendering.


