To improve the quality of your vocal mixes, it is important to have a vocal chain that allows you to structure your mind and be more efficient. But how do you build it? Where do you start? All the answers can be found here.

Need a professional sound engineer specializing in pop and hip-hop mixing ? Great! Take a look at our services and let’s blow up your career together!
Let’s start now!
What is a vocal chain ?
Before we dive into anything more technical, let’s first answer an essential question: « What is a vocal chain? »
In music mixing, a vocal chain is simply a series of audio tools (plugins or hardware units) through which the unprocessed voice will pass to be introduced in your final mix.
It is called a « chain » because each insert slot can be seen as a link in a chain in which each element has a specific purpose. As soon as a link breaks, the chain breaks.
Through this article we will see which tools to use to get the best results. We will explain how to achieve the best results by making the right choices and why to make them.
It is very important to keep in mind, before starting to read this article, that each sound engineer has his own vocal chain. There is no ultimate truth that is better than the others, just different workflows and visions.
As you read on, you will quickly realize that a specific pop vocal chain is outlined in this article, but that it is by no means to be applied to the letter. It is a path to explore to build your own pop vocal chain.

Does the order of the vocal chain matter ?
Yes, yes and yes again! I could not insist more on the importance of the order of a vocal chain, whatever the musical genre. Thinking about the order of a vocal chain should be a priority before starting building it.
But why? For the simple reason that, whatever DAW used, the plugin that comes last is always the « master ». Does this mean that the less important plugins should be placed first in the vocal chain? No, not really. Let’s look at some concrete situations.

Situation : I want to give a saturated phone effect on my voice on a part of a song. So I want to cut the top and bottom of the spectrum with EQ. For the most accurate results, should I place my EQ before or after the distortion?
After! Because if I do it before, the distortion tool will create up and down harmonics that will affect the accuracy of my EQ.
Listen to these two audio examples to understand.
EQ BEFORE distorsion
EQ AFTER distorsion
The difference in rendering is enormous! In the first one, where the EQ was placed before the distortion, very clearly aggressive harmonics can be heard, both in the high and in the low end of the spectrum.
The second audio clip sounds much softer and the low and high frequencies are much better delineated, which is what we were looking for. So it was clearly better to place the EQ after the distortion.
Before starting…
Before even thinking about the plugins or type of plugins that will be added in the new pop vocal chain, it is important to do one thing: clean the vocals. Why? Because there’s a big chance that your vocal chain will emphasize some defects if they aren’t reduced or simply removed. But what kind of cleaning are we talking about? Answer just below!
A. Room noises
A moving chair, too much ventilation noise, a person talking during the recording, an ambulance siren,… All of these things happen very quickly in a vocal recording.
And if you don’t take the time needed to clean them up, especially in the gaps or in the quieter moments, your brain will get used to them and you won’t hear them anymore. But the listeners will.
Doing this cleaning manually can be very time consuming. But with Clarity Vx from Waves, you will easily get rid of all these unwanted and unnecessary parasites.

B. Mouth Noises
Saliva, unvoiced syllables, breaths,… This kind of noise can be very annoying, and can completely break the universe you create around the vocals.
Some plugins allow to get rid of this kind of noise quickly, RX7, for example, is one of the most efficient plugins.
1. Tuning
In pop music, 98% of the songs need to be correctly tuned. The public these days is literally intractable in this respect. One wrong note on the radio, and it’s over.
With the precision tools we have at our disposal today, you can’t miss a good retuning. But how to proceed? Well, depending on the situation, there are two ways to do it.
A. Manual Tuning
If the song you are working on needs to emphasize the natural aspect of the vocal melodies, manual tuning is the way to go.
The manual tuning tools will allow you to adjust the pitch of each note with precision, without distorting the color of the voice. Depending on the tools, you will often have the possibility to play with the formant to be sure, on the most extreme corrections, not to make the pitch correction noticeable by the listener.
The best tool for this kind of procedure is undoubtedly Melodyne 5, which allows you not only to process the pitch of an audio source, but also to modify its volume, the position of notes in time, vibrato, etc. In short, it’s a very advanced tool, but it can be expensive.

If you don’t want to spend your wallet on a tuning tool, which is understandable, I suggest you go with Waves Tune. It’s exactly the same principle as Melodyne, but without the many features that Celemony’s software offers, and with less quality.
In some DAWs, this type of tool is already implemented in the software, as in Cubase and FL Studio, for example.
B. Auto-Tune
With the meteoric rise of hip-hop culture in recent years, its best friend, auto-tune, has inevitably found its way into pop music as well. Just listen to the current top 20 hits, and you’ll hear a touch of autotune on at least half the tracks.
In pop music, auto-tune is not (usually) used as extreme as in rap. It is often used in a more subtle way, to take advantage of the sonic character it can add to the vocals.
It is often found, not surprisingly, in tracks that are close to rap, RnB or hip-hop culture in general.
For many years, Antares’ Auto-Tune Pro has dominated this market in a rather large way. But some brands are starting to have their say, the recent MetaTune from Slate Digital, Waves Tune Real Time from Waves, or the Auto-Tune emulation from UAD, all have a very distinct sound that will sometimes make Antares’ plugin not the best.
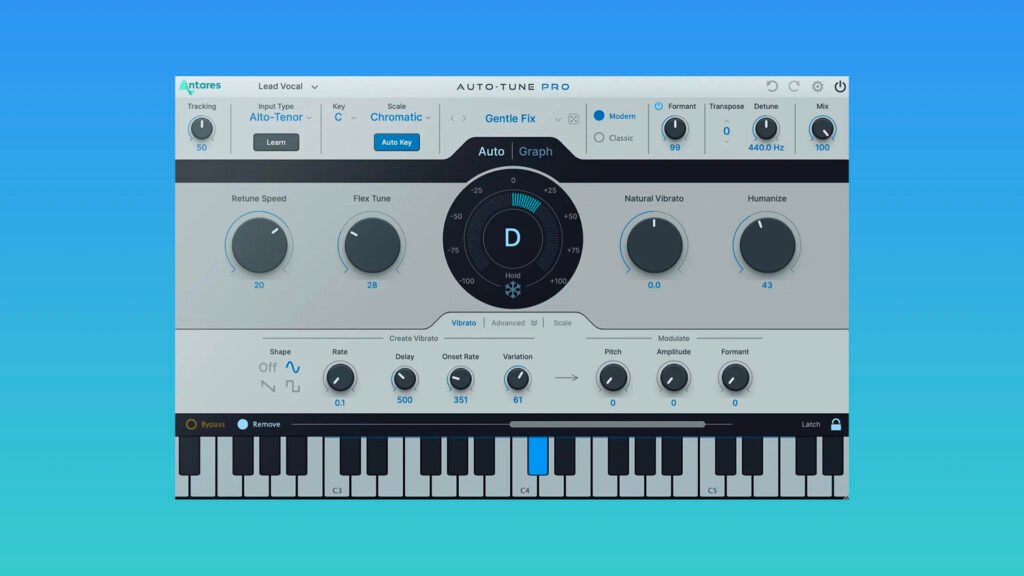
Personally, I always take the time to compare several auto-tunes before choosing the one I want. The final result will always be better.
In some cases, and this happens a lot in pop mixing, you might need to tune the voice manually and with auto-tune. This often depends on what is requested by the artist or the label.
If it is the case, don’t make the mistake of putting the autotune before the manual tuning tool, or you risk creating very unpleasant artifacts for the listeners.
2. Compression & Control
Compression before EQ? EQ before compression? This is an eternal debate between mixing engineers. But I am one of those who are convinced that controlling the dynamics of a voice is the priority for a quality work.
In my opinion, placing the compressor after the EQ is like compressing all the frequency processing you’ve done; without really knowing the change in adjustment. To illustrate the principle, you would go from this…

To this…

This is why I’m convinced that putting a compressor before the EQ is way better than the opposite. But what kind of compressor should you use? And with which parameters?
Some compressors are used to give more character to vocals, that’s not what we’re looking for here. The compressor we’re going to use here will simply be used to slightly control the dynamics. This will allow us to work on something more robust and straight for the rest of the process.
It won’t be necessary to use an elaborate compressor for this purpose. Your DAW’s stock compressor will clearly do the trick. I have to admit that I am a big fan of the Waves RCompressor. If you have it, don’t hesitate to use it for this step.

The first parameter to adjust is the threshold. Keep in mind, when setting the threshold, that in this case only the loudest levels should be compressed.
We don’t need to capture the whole dynamic range, only the level jumps. This will bring those levels back to the same level as the whole signal and allow us to work on something much more robust.
For this kind of purpose, I recommend setting the threshold between 2.5 and 3.5. The compression doesn’t have to be heard, it should be subtle.
As far as the attack time is concerned, it is generally between 1ms and 5ms. And between 80ms and 150ms for the release time.
To find the ideal values, you simply have to listen and adjust accordingly. Trust your ears, not what you see.
3. Subractive EQ
Now that we have something robust to work with, we can start « cleaning up » the vocals. We’ll call this subtractive EQ.
A subtractive EQ is one that will be used to reduce the gain of certain frequencies or frequency areas.
This type of frequency processing must be done before adding anything to the vocals. In vocal mixing, there are several typical cleaning treatments, among which are… :
A. High-Pass Filter
No matter what microphone or equipment you record with, and no matter what the voice, you will always have to get rid of the noise in the lower end of the spectrum.
These low frequencies can be produced in many different ways: Pop noises, unwanted harmonics, preamp background noise, movement,… But whatever the nature, these frequencies are useless and should be totally removed from the vocal track. That’s why we will use a High-Pass Filter.
This filter usually has a steep slope (between 18 and 24 dB/octave) and can be placed, in my opinion, at a minimum of 100 Hz regardless of the type of vocal.
B. Sweeping EQ
In all vocal mixes, even the most professional ones, there are specific frequencies and harmonics that need to be cut as well. But how to find them? By the principle of sweeping EQ.
The principle is simple, it consists in finding the aggressive frequencies by sweeping through the frequency range with a high gain and Q (very tight band). This will quickly bring out the undesirable frequencies which can then be cut.
In most cases (not all!!), you will also have to reduce these frequency areas :
- Core frequencies : The frequency range between 100 Hz and 150 Hz is not very loved in vocal mixing. It should not be cut, but simply lowered to emphasize the rest of the more interesting frequency range.
- Nasal frequencies : The frequency area between 800 Hz and 1500 Hz is very likely to be overloaded with very nasal frequencies which can be very strong in some singers and less so in others. It is important to take the time to listen carefully.
- High-end range : The area between 3.5 kHz and 6 kHz can be very aggressive to the ears and should be reduced slightly in most cases.
You can learn more about sweeping EQ by clicking right here!
But what kind of plugin to use for this kind of purpose? Actually, any full-parametric EQ is ideal for this cleaning phase. So you can use your stock EQ without any problem!

But if you want to use a high performance plugin, there is no better than FabFilter’s Pro-Q3. The number of features available is impressive. The accuracy and efficiency of the interface is also impressive. With this plugin in your hands, it’s impossible to miss any flaws!
4. De-esser
Adding a de-esser to your vocal chain is often a step forgotten by vocal mixing enthusiasts. However, it is an essential step for a quality result.
The reason is quite simple: they don’t understand what the purpose of the plugin is and even less how to use it. Let’s use the definition to really understand the principle of de-essing.
A de-esser is a tool (usually in the form of a plugin) that, above a certain threshold and in a given frequency band, reduces the sibilant sounds (“t”, “s”, “f”, “ch”) of an audio source, which is usually a human voice. It allows the user to avoid level and energy jumps as soon as a sibilant sound is produced.
These sibilant sounds are generally located in the frequency range between 6 kHz and 9 kHz. They tend to be lower for men and higher for women.
Our buddy the de-esser will therefore allow us to decrease the energy of this frequency zone only when a sibilant sound is too loud there.
Click here if you want to learn more about the art of de-essing!
It is important to keep in mind that sibilant sounds will always sound very different depending on the singer, the microphone, the preamp and the converters used.
De-essing should generally be done in two steps :
- Locate where the critical frequency zone is, where the sibilance is loudest.
- Listen to how loud or soft the energy of the sibilants is in relation to the overall speech signal.
From there, you can determine where you act and with what intensity.
Need a professional sound engineer specializing in pop and hip-hop mixing ? Great! Take a look at our services and let’s blow up your career together!
Let’s start now!
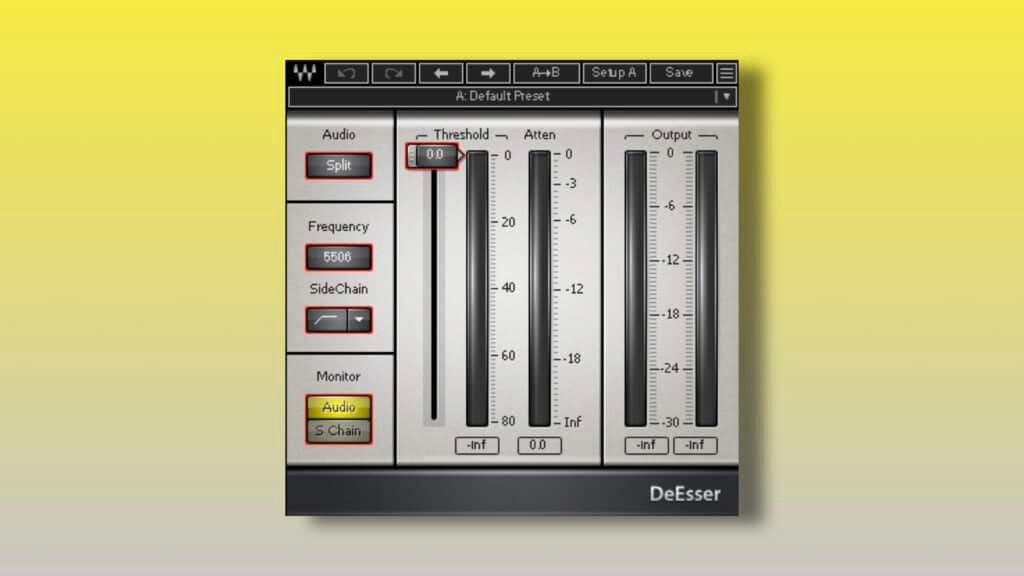
De-essing is a process that must remain relatively simplistic. I advise you to use simple plugins for this purpose. De-Esser from Waves is, in my opinion, one of the best. It is easy to use and extremely instinctive.
Personally, I’m a big fan of Sibilance for the total control you can have over the energy of the sibilant sounds. But the choice of plugin will always be very subjective!
5. Additive EQ
A good vocal mix is one in which the vocals are clean, but also in which the vocals have character and are exciting to listen to.
Therefore, after doing all this very theoretical and unexciting cleaning process, it will be necessary to push certain frequency areas. Those which will give to the vocals all that it misses to be warmer, clearer, more present, more aggressive,… In short, all adjectives that will be linked to a specific frequency zone.
When we boost the gain of certain frequencies or frequency zones, we speak of additive EQ.
A. Air Zone
There is one frequency range that will be boosted in almost every vocal mix : The air zone (everything above 12 kHz). In the other frequency ranges, you will always have to take the context into account before deciding to boost or not.
By boosting this area by a few dB (be careful not to go too far in the boost), you will give more clarity, purity and openness to the voice.
B. Warmth
Do you feel that the vocals sound too thin and that they are not warm? Then you should boost the frequency range around 100-120 Hz.
This will allow you to give the vocals more charisma. But be careful not to push this frequency range too much at the risk of masking the rest of the frequency spectrum.
C. Presence
Sometimes, some vocal recordings cause (naturally) a lack of presence. This results in an impression of distance in the mix. As if, even at the highest level, the voice seems to stand behind everything.
To counteract this problem, simply boost the frequency range between 2 kHz and 3 kHz slightly. The voice will quickly come to the front of the mix, without even changing the volume and balance.
D. Aggressiveness
The vocals you work on lack aggressiveness? Punch? You feel like they are being eaten by the instrumental. Then you need to boost the area between 4 kHz and 8 kHz.
By doing this, you will allow the vocals to « cut through the mix ».
All these cases are obviously only theoretical. At the risk of repeating myself, never forget to listen to the vocals in context and adjust the parameters according to what you hear.
Sometimes you may need to boost unusual frequency areas. This is not a problem at all! Trust your ears, not what you see!
Can I also use my stock EQ or Pro-Q 3 for this kind of thing? Ideally, no.
Ideally, you should use EQs that will not only boost certain frequency ranges, but also add some color and character to the vocals. There are a lot of plugins that can do this. But some better than others.
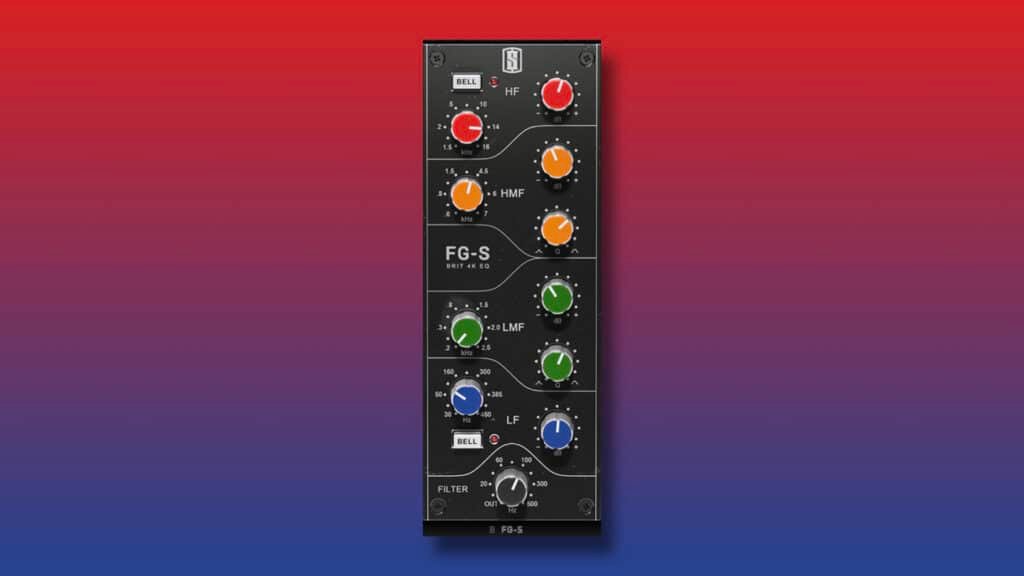
I am personally a big fan of FG-S from Slate Digital. The slight SSL-like distortion that the plugin is able to add is really perfect for vocal mixing. It’s great for adding air but also warmth in the lower end of the spectrum.
You can also try the Mäag Audio EQ4, an emulation of a legendary EQ that you can’t mess up with!

And last but not least, V-EQ4 from Waves. An underrated plugin that will add a really special analog touch to your vocals. This plugin has the big advantage of being very affordable compared to what is usually found on the market.

By the way, do you want to know what is my personal Top 6 EQ plugins for mixing rap vocals ?
6. Compression & Tone
As we saw at the beginning of this article, some compressors will be used for their most primitive purpose: to reduce the overall dynamics of the signal. This was the case with the very first compressor in our chain, which we used in a relatively gentle way to make the voice a little more robust.
Other compressors, as we will see now, will be used to give more character, tone and color to the voice. But it is important, in this respect, not to use just any compressor.
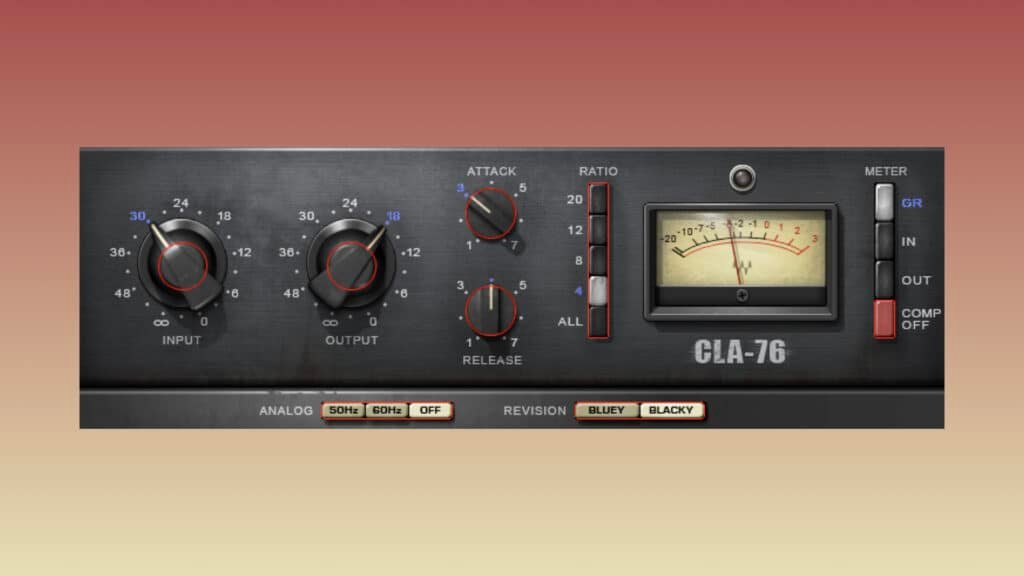
The best type of compressor, to give more character to a voice, is the FET compressor. The most legendary compressor of this type is the 1176 from Universal Audio. There are many emulations on the plugin market. In my opinion, the one that best captures the tone search is the CLA-76 from Waves. The color and character it adds is really special.
But how do you use it the right way? In my opinion, the best results are obtained by aiming for an average gain reduction of 3 to 5 dB.
The ideal ratio for a voice will generally be 4:1, sometimes more for vocals with high macro dynamics.
Attack and release times may vary. For the attack, it can be interesting to emphasize the transients of the voice by placing the knob between 3 and 5. For the release, it is usually between 3 and 6.
As a reminder, the attack and release time values are not indicated in milliseconds, they are only reference values. It is also important to note that the higher the number, the shorter the time. For example, an attack time of 1 is much slower than an attack time of 5.
If you use it the right way, the vocals will not only be more robust but will also be warmer and have much more character. In fact, it’s a slight distortion from the FET that creates this coloring. This allows us to take the next step!
7. Harmonic enhancement
Many people think that anything that has to do with distortion and saturation is clearly not suitable for vocal mixing. They simply think that in music, vocals should be kept as clean as possible. In reality, it doesn’t work that way!
The human ear does not like what sounds « perfect ». We naturally like what is a little « dirty ». Whether you’ve noticed it or not, there’s always a little bit of dirt in the vocals or the instrumental in the biggest pop hits these days.
The hardest part is finding a happy medium. We want to add an extra grain of distortion without altering the overall quality of the vocals. In pop music, and for the reasons mentioned above, this is an essential step.
Of course, you might think that if the amount of saturation is very light, it’s not that essential. But don’t get me wrong, the audience loves this touch of distortion for the character it can give to the vocals. But how do you add that touch of distortion in the right way ?
There are two ways to proceed :
- Choose a plugin that has a mix knob. With this, you can adjust the balance between direct and distorted sound (usually around 10% – 90%, or even less)
- Duplicate the track to be able to work in parallel and process the distorted signal only on the duplicated track (100% wet in this case, we will adjust the balance with the fader)
For this kind of thing, both ways of working are good, it’s up to you what you prefer. But keep in mind that the added saturation or distortion should not necessarily be heard, but felt.
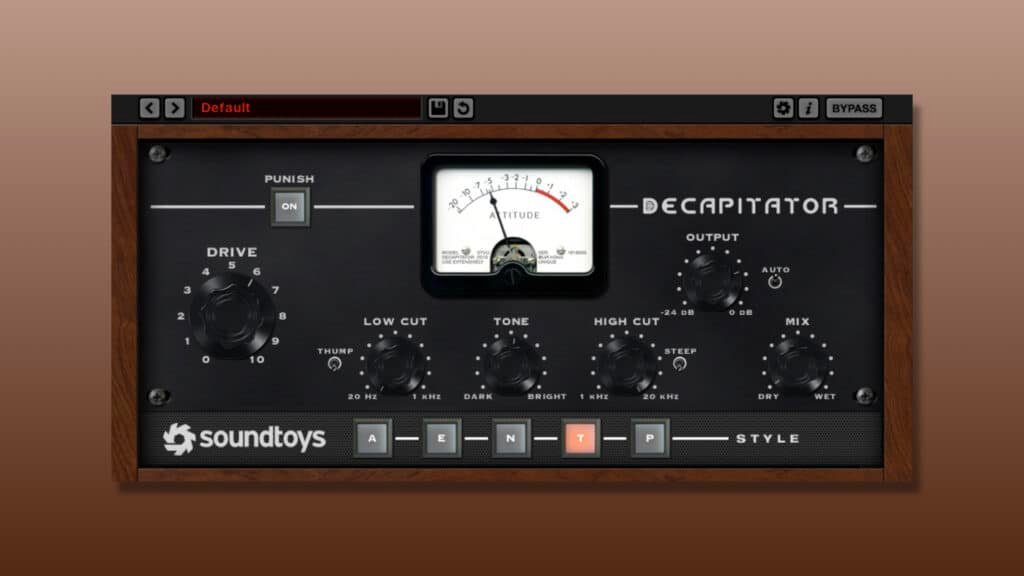
In the field of harmonic enhancement, the king has been Decapitator from Soundtoys for several years. With its 5 types of distortions, this plugin is a real Swiss army knife.
If you want to discover more plugins, I also recommend iZotope Neutron 4 or Denise God Mode!
8. Multiband compression (advanced)
In the field of vocal mixing, it is important to take into account that the intensity, energy and frequency content will differ greatly throughout the song. So you need to be able to find a way to counteract these jumps in dynamics and frequency spectrum.
For this purpose, the multiband compressor is your best friend. A multiband compressor is a compressor divided into several frequency bands that can be processed completely independently.
In vocal mixing, this tool can mainly be used in two different ways :
A. Control
Depending on the notes emitted by the singer/rapper, certain frequency zones will sometimes be more solicited than others. And this can vary greatly over the course of the song.
For example, if he/she decides to sing an octave lower on a bridge, the lower-medium will clearly be used more than on the whole song. The multiband compressor will have to be adjusted so that this « excess » of the lower midrange is controlled and stays in line with the frequency spectrum of the rest of the song.
B. Character & Robustness
It could also be that instead of wanting to control certain frequency bands, you want to give them more power and strength. It happens very often in pop music.
This can often be the case for the presence zone between 2 kHz and 5 kHz. If you really want to bring this frequency band out through the mix, while making it more robust, then you can use a multiband compressor.
You will then have to use the tool like a regular compressor by readjusting the makeup gain to keep the same volume in and out. You can also decide to output a higher frequency band than the input, there are no rules as long as you serve the final result
Need a professional sound engineer specializing in pop and hip-hop mixing ? Great! Take a look at our services and let’s blow up your career together!
Let’s start now!
But which plugin to use? In fact, it can be interesting to use one for control purposes and the other for character purposes.
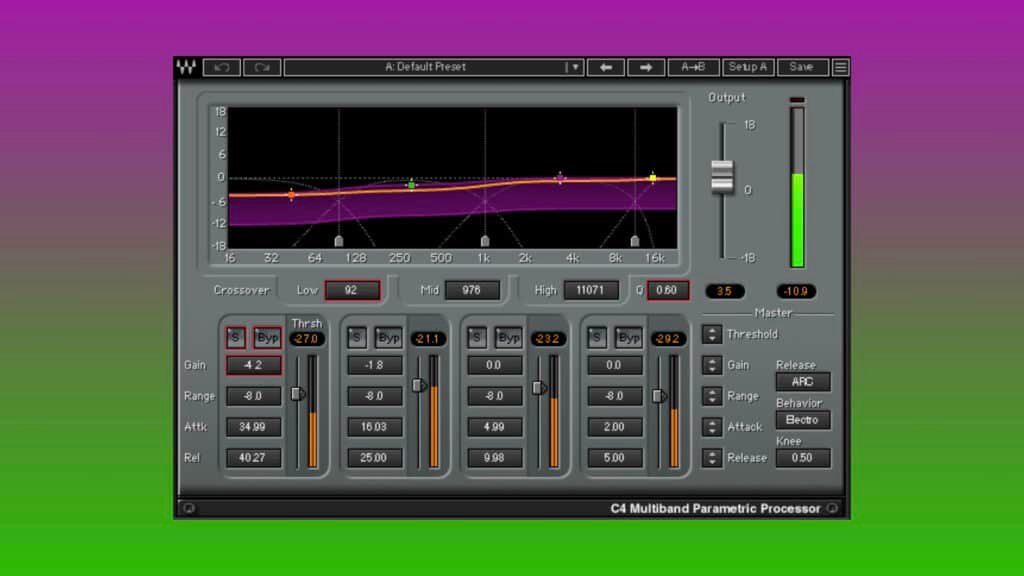
In the first situation, for control purposes, the best plugin in my opinion is C4 from Waves. Instinctive, easy to use and comes with great presets.
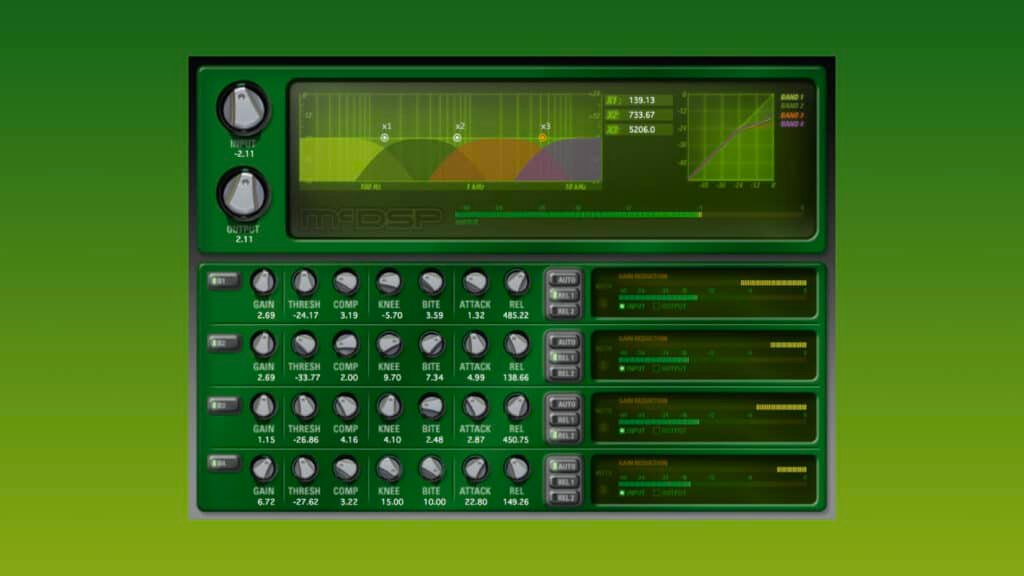
In the second situation, to add character to vocals, there is clearly no better than MC2000 from Mc DSP.
I really recommend you to try both of these plugins!
9. Parallel compression (advanced)
In the field of audio, parallel compression is a mixing technique that allows, by the principle of duplicate or auxiliary, to blend two identical sources of which one of the two is “dry” or smoothly compressed, and the other one heavily compressed, even squashed.
The art of parallel compression is not an easy technique to master, especially in the field of vocal mixing. But when used properly, the results are fantastic!
There are two ways to proceed:
- Either by using the auxiliary principle and sending the signal through a bus in a parallel track which will be compressed.
- Or by duplicating the track, but this implies copying all the processing on the parallel track to work on something clean.
I personally find the auxiliary technique much more practical because all the processing done in the insert will be copied to the parallel track. We can then concentrate 100% on adjusting the compression. But how to adjust the compression settings?
In fact you should keep in mind that the compression applied to the parallel track must be extreme, you really shouldn’t be afraid to completely crush the entire signal.
- The threshold should be low enough to capture the entire signal, even the lower levels.
- The attack must be short enough that it doesn’t let powerful transients stand out (compression would bring them to the fore)
- The release time should be medium. Not too long to let the compressor work, but not too short to avoid level jumps and a feeling of pumping.
- The ratio should be relatively high, between 15:1 and 30:1. Some even use a ratio of ∞:1.
The type of compressor used depends very much on individual taste. Some people love to use a FET compressor with which they completely saturate the parallel signal, but I am more of the opinion that a VCA compressor can bring a lot of solidity to the direct signal.
I recommend to try the API 2500 emulation from UAD, a gem!

If you want to learn more about parallel compression, click here!
10. Add Effects to the vocal chain
Adding effects, which usually means delays and reverbs, is a very important step in the vocal mixing process. It allows to link the vocals to the instrumental and to place them in a certain sound universe.
The important thing with the use of effects is to use them with auxiliaries. Indeed, using reverbs and delays as inserts is the worst way to find a good balance between dry and wet signal while keeping a good gain staging.
Using a good bus system to send the dry signal to several effects auxiliaries has the advantage of being extremely practical and also allows to place no limits on creativity.
The basic premise before adjusting the balance between vocals and delays and reverbs is to find the effects that fit well with the vibe and general universe of the song. This is far from easy, it requires concentration and a lot of experience.
Here’s a pro tip to help you find the right reverb: When the vocal track you’re working on is almost finished, mute the vocals and listen to the instrumental solo. The goal is to try to imagine the vocal universe that would go well with the instrumental.
Do you need something intimate? More of an enclosed space or atmospheric? Clear and aggressive or darker? There are actually a lot of questions to ask yourself to find the right reverb. It is above all a question of feeling. There is no theory that can solve this problem.
Last tip: Don’t leave the effect sends at the same level throughout the song. Make them come alive with automations!
Learning how to blend reverbs and delays with vocals is not easy. In this article you will get all the information you need to do it with rap vocals. The process is very similar for pop vocals.
Which plugin to choose? Well, actually, the choice of reverbs and delays is very subjective, but there are some plugins that are « classics » in vocal mixing. I tell you about them right here!
Crafting a pop vocal chain: Conclusion
Crafting a good pop vocal chain that fits your needs is essential for two things: efficiency and quality. In music mixing, being able to structure your ideas and process is the most important thing to do before diving into anything more technical. This is exactly why crafting a vocal chain is important.
Keep in mind that this vocal chain is only theoretical, if it deviates a bit from the steps stated in this article, it is far from being a drama. On the contrary, it is that something more personal singular is built around the mixing process. This is a good point!
If you have any questions about that topic or anything in the music mixing field, please contact me, I’m always happy to help!
Related articles:
My favorite tools for mixing pop and hip-hop music:
Plugins
In the field of auto-tune, I’m convinced that nothing’s better and more efficient than Antares Auto-Tune Pro. As for the EQ’s, FabFilter Pro-Q3 and Slate Digital Infinity EQ are, in my opinion, the best tools. For compression, I have 2 favorites plugins: Waves RComp and UAD EL8 Distressor.
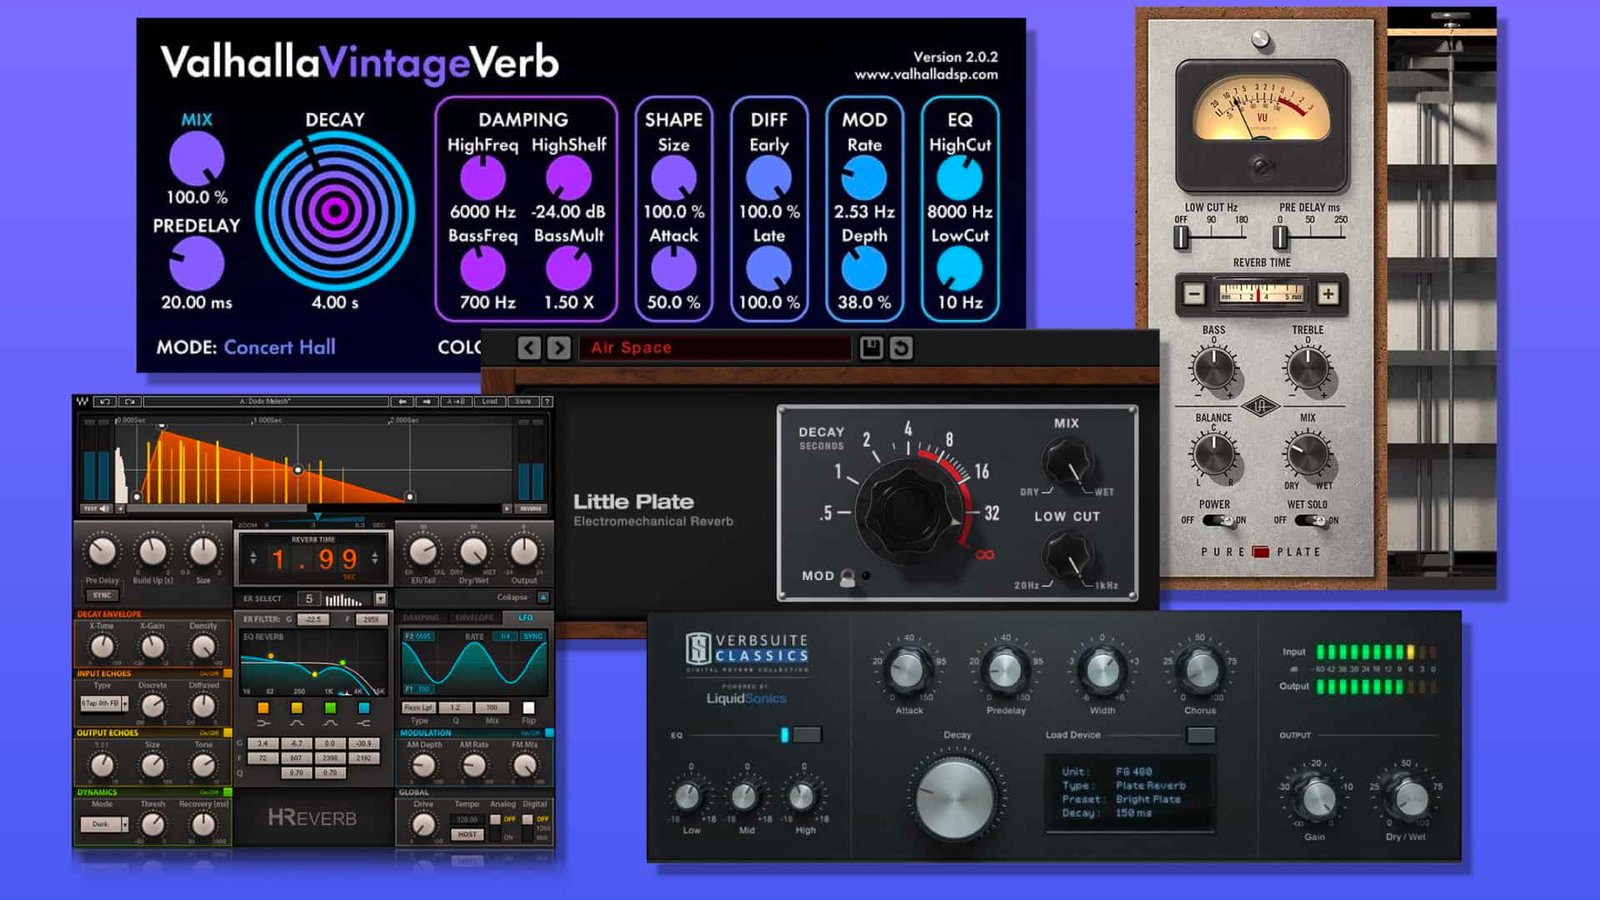
As for reverb, I’m a big fan of the Soundtoys Little Plate, but generally, I go for the Valhalla VintageVerb for its versatility. I also love the Arturia Rev PLATE-140 and the UAD Pure Plate for its organic side.
Headphones
The closed headphones I love and will always love using for mixing pop and hip-hop music are the Beyerdynamic DT-770. As for the best open-back headphones, I use the Sennheiser HD600 headphones, and I’m really happy of them!
Monitors
Having a pair of Yamaha HS7 in its studio or home studio is always cool for more excitement while listening to your mixes. The Adam Audio T7V monitors are also super accurate. In my studio, I also have a pair of Genelec 8030 for their reliability.
Hardware gear
For anyone who wants to start using hardware in their mixes, I always recommend these 2 units from Klark Teknik: the EQP-KT and the 76-KT. Don’t forget to use good converters, such as the Apollo interfaces. This is essential for a good rendering.


