In order to mix vocals in a professional way, it is important to follow some specific steps. Generally speaking, there are 8 essential steps in vocal mixing. But what are they? How do you integrate them into your workflow? I give you all the answers in this article.
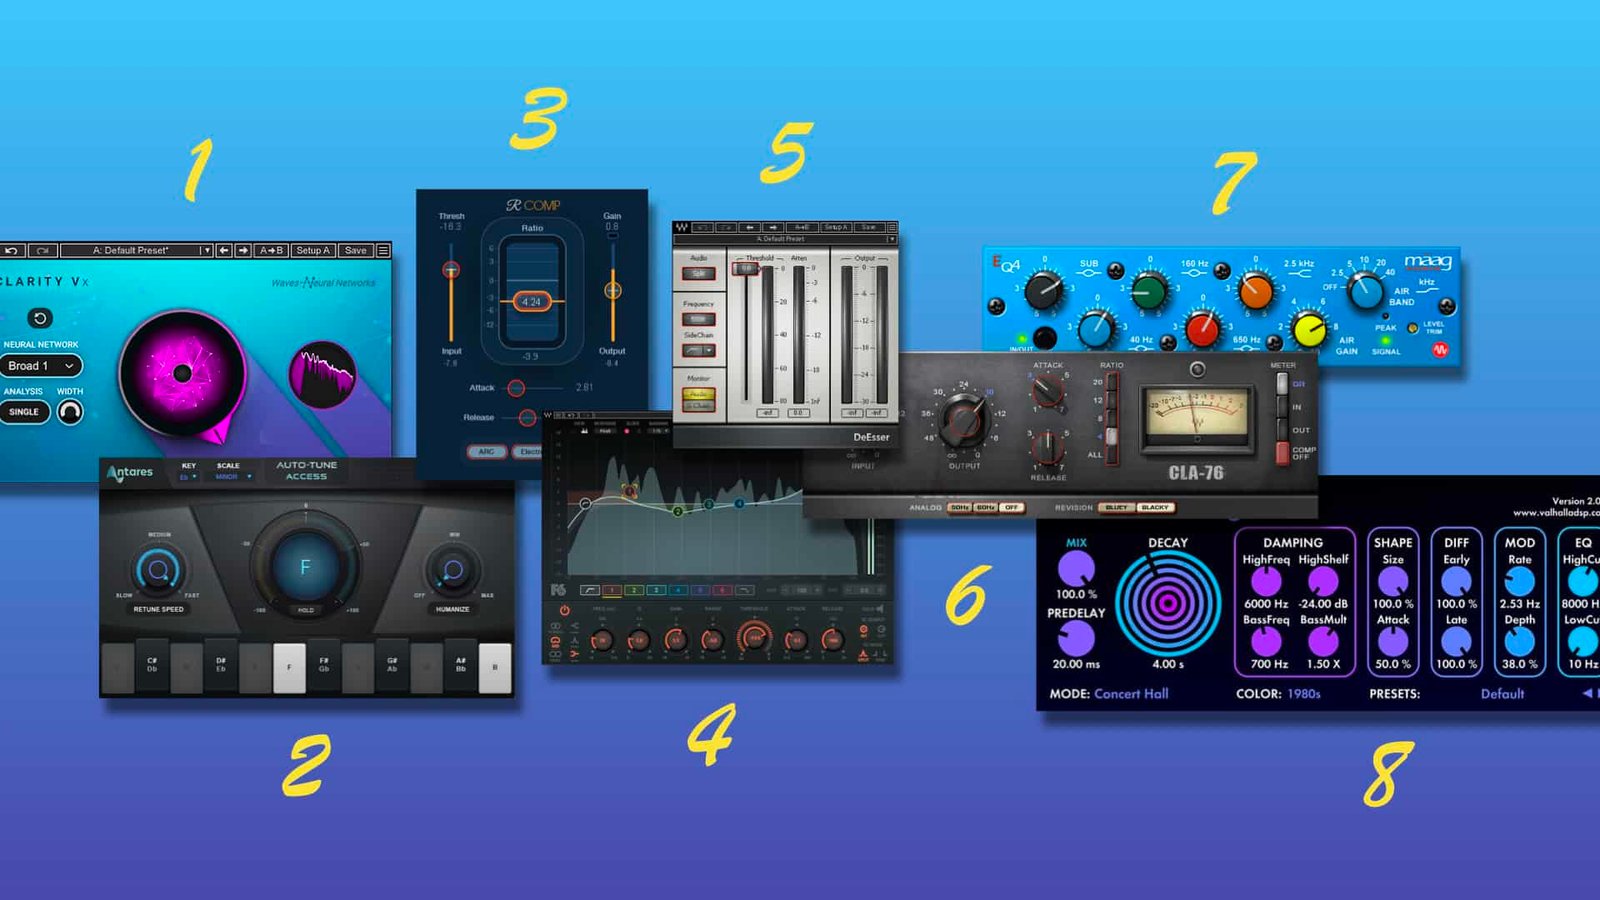
The 8 essential steps of vocal mixing are:
- Cleaning and noise removal
- Tuning
- Dynamic compression
- Subtractive equalization
- De-essing
- Additive equalization
- Tonal compression
- Effects (reverb and delay)
Is the order important?
The first thing to clarify before tackling the steps of vocal mixing is whether the order of these steps is important or not. Well, it is simply impossible to answer this question with a yes or no.
In fact, the question can be answered in two ways that will completely change the answer. What changes is the point of view you take. So let’s split the general question in two…
In music mixing, is the order of processing important?
YES! In music mixing, the order in which you place your plugins is even essential! Keep in mind that, in all DAWs on the market, the insert slots are in series, not in parallel.
This means that the last insert plug-in will always take » the upper hand » over the rest of the processing. Does this mean that the last plugins are more important than the others? Not at all! But it does mean that, in some cases, a change of order could drastically change the tone of the overall processing.
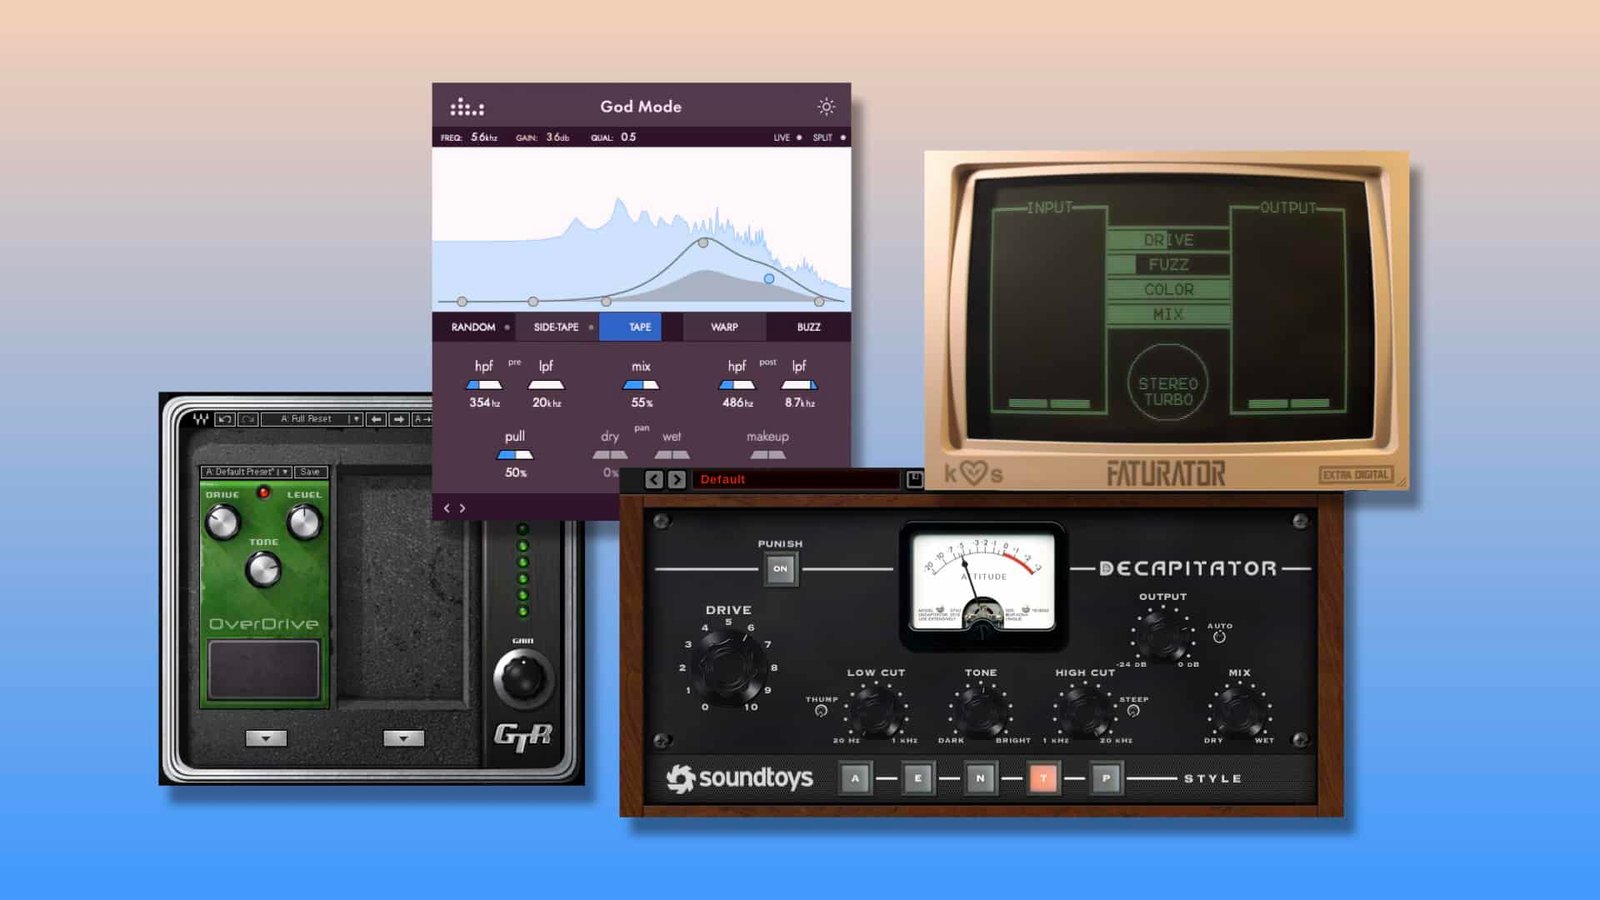
To illustrate this example, I like to use the EQ and saturation combination. Indeed, if I place a « radio effect » with my EQ (high-pass + low-pass), then add a saturation, high frequencies will be clearly heard. But if I do the opposite, the high frequencies will be filtered much more precisely. If you have trouble understanding, no problem, the audio example will be much more meaningful.
From these vocals:
EQ before saturation
EQ after saturation
With this example, you can surely hear how important the order of processing is in music mixing. But there is a more specific question to ask:
In vocal mixing, should I follow these 8 steps in the exact order?
No. The order of the vocal mixing steps is definitely adjustable to your needs and workflow preferences.
In fact, what you should keep in mind when mixing vocals is that each processing step should help the next steps to be comfortable. The order presented in this article is often the most ideal and comfortable. But every mixing situation is different.
For example, it could be that the singer you recorded has some pretty strong sibilance in his/her voice. In this case, a de-esser first would clearly be welcome! It could also be that in the recording there is a big rumble in the low-end range. In this case, it would be more appropriate to clean up this rumble with an EQ first .
There are many situations where this order can be completely changed. But don’t go too far either. It is important to keep this order as a base, then move things around if necessary.
Can I follow these steps with free plugins?

Yes, you don’t need to use fancy plugins to get pro results. This is a misconception that really needs to be removed from the music production community.
Paid plugins are certainly better than free plugins. But they can also be much more complicated to use and understand, and therefore ruin your workflow.
When I’m asked this question, I always say this: The result will always be better with free plugins that you know well than with paid plugins that you can’t use properly.
Buying more « professional » plugins should only be done out of need, not desire. By doing so, you risk not improving. And even go in a direction that is not the right one.
So, yes, you can definitely follow and apply these steps with free plugins. If you use them correctly, you will be amazed by the results.
ℹ️ Do you want to know if you need to buy paid plugins to mix professionally? Then I advise you to check out this article: Do You Need To Buy Plugins To Mix Music Professionally?
1. Cleaning and noise removal
In vocal mixing, before doing anything, it is essential to do a complete cleaning.
No matter how good the recording is, you will always find unnecessary noise in every take. They must be removed to avoid any bad surprises during the mixing process and especially during mastering.
There are two types of noise to be aware of when cleaning:
A. Background noise
Preamp air, singer/rapper movement noise, noise in the recording room, outside noise,… Background noise can be found in many situations. To get rid of it, two ways are available to you.
- Noise gate: Using a noise gate is the most common way to get rid of any background noise. As soon as the volume of the vocals falls below a certain level, the signal is cut. This technique is very practical as it allows a quick and efficient cleanup. But the problem is that a noise gate can sometimes cut out certain elements of the vocals that you want to keep, without you really realizing it. So be careful…
- Manual cleaning: The second technique is simply to edit the vocal recording manually and remove the background noise with your mouse. This takes more time, but the result is likely to be more accurate and efficient.
Sometimes, in some amateur or semi-pro recordings, the background noise is so strong that it is noticeable even when there is signal from the vocals. In this case, another tool can be useful:
- Noise remover: The noise remover uses a more advanced technology than the noise gate. It is able to identify the sound profile of the background noise and separate it from the direct source, in our case, the vocals. Most of the time, you will be able to adjust the balance between direct and background noise, regardless of the input gain of the vocals. Very practical! But be careful not to overuse it, it could deteriorate the quality of the vocals.

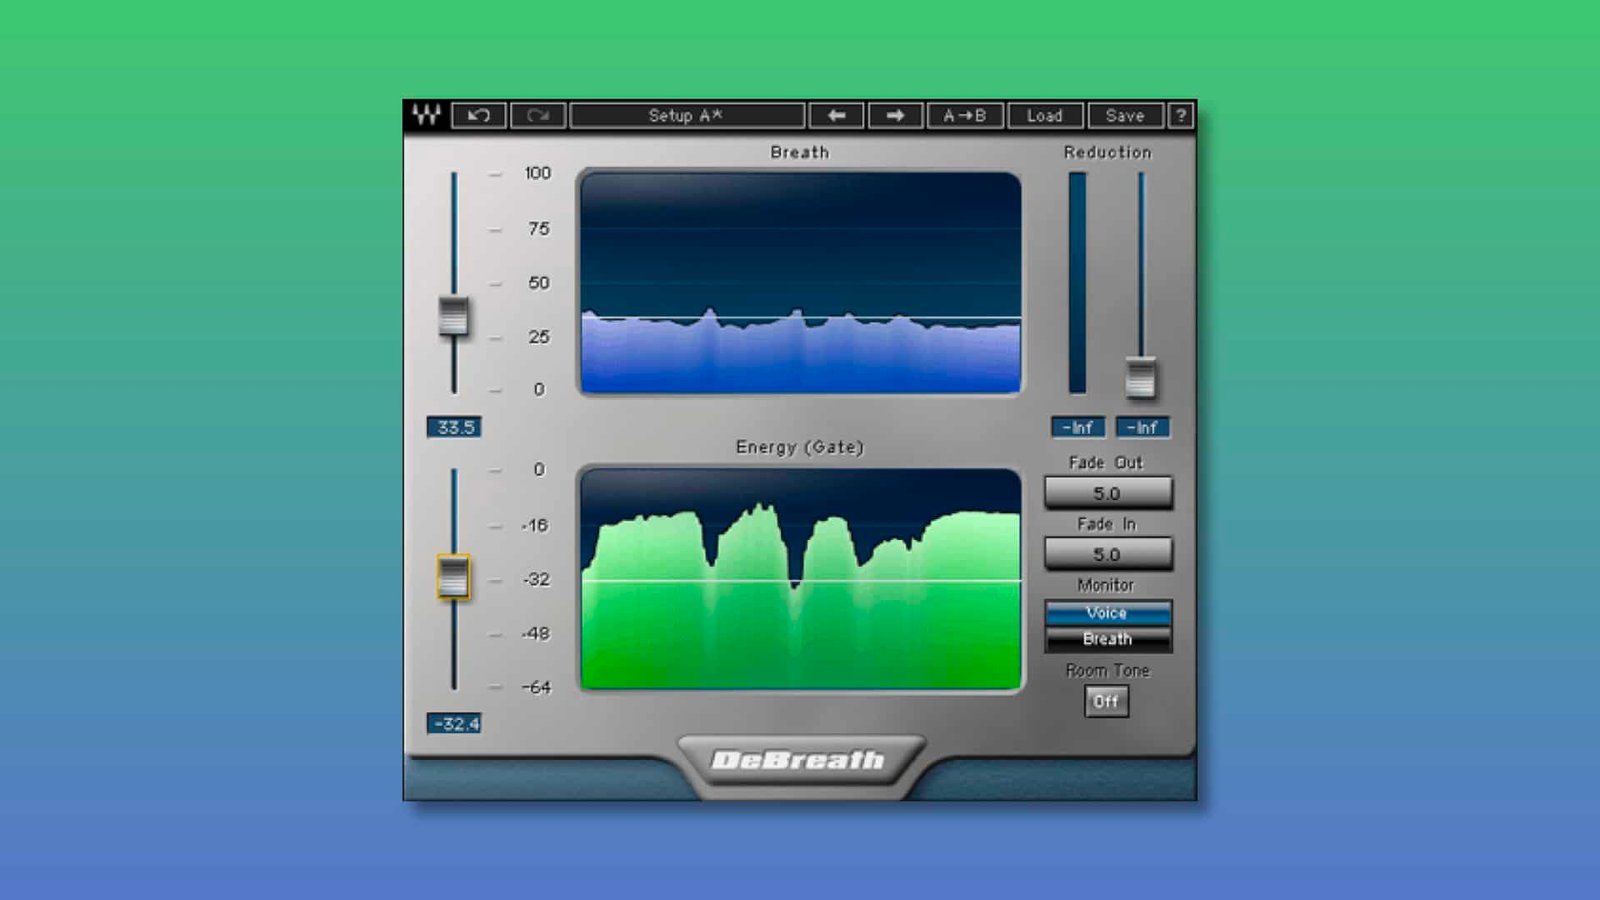
B. Breaths
Breathing is natural in vocal recording. But breaths that are too powerful can sometimes distract the listener from the universe of the song. But, contrary to what many people think, breaths are not always to be totally removed in music mixing. Sometimes they are even… essential!
When it comes to breaths, you have to make a choice between 3 possibilities: Leave the breath as it is, decrease it slightly, or remove it.
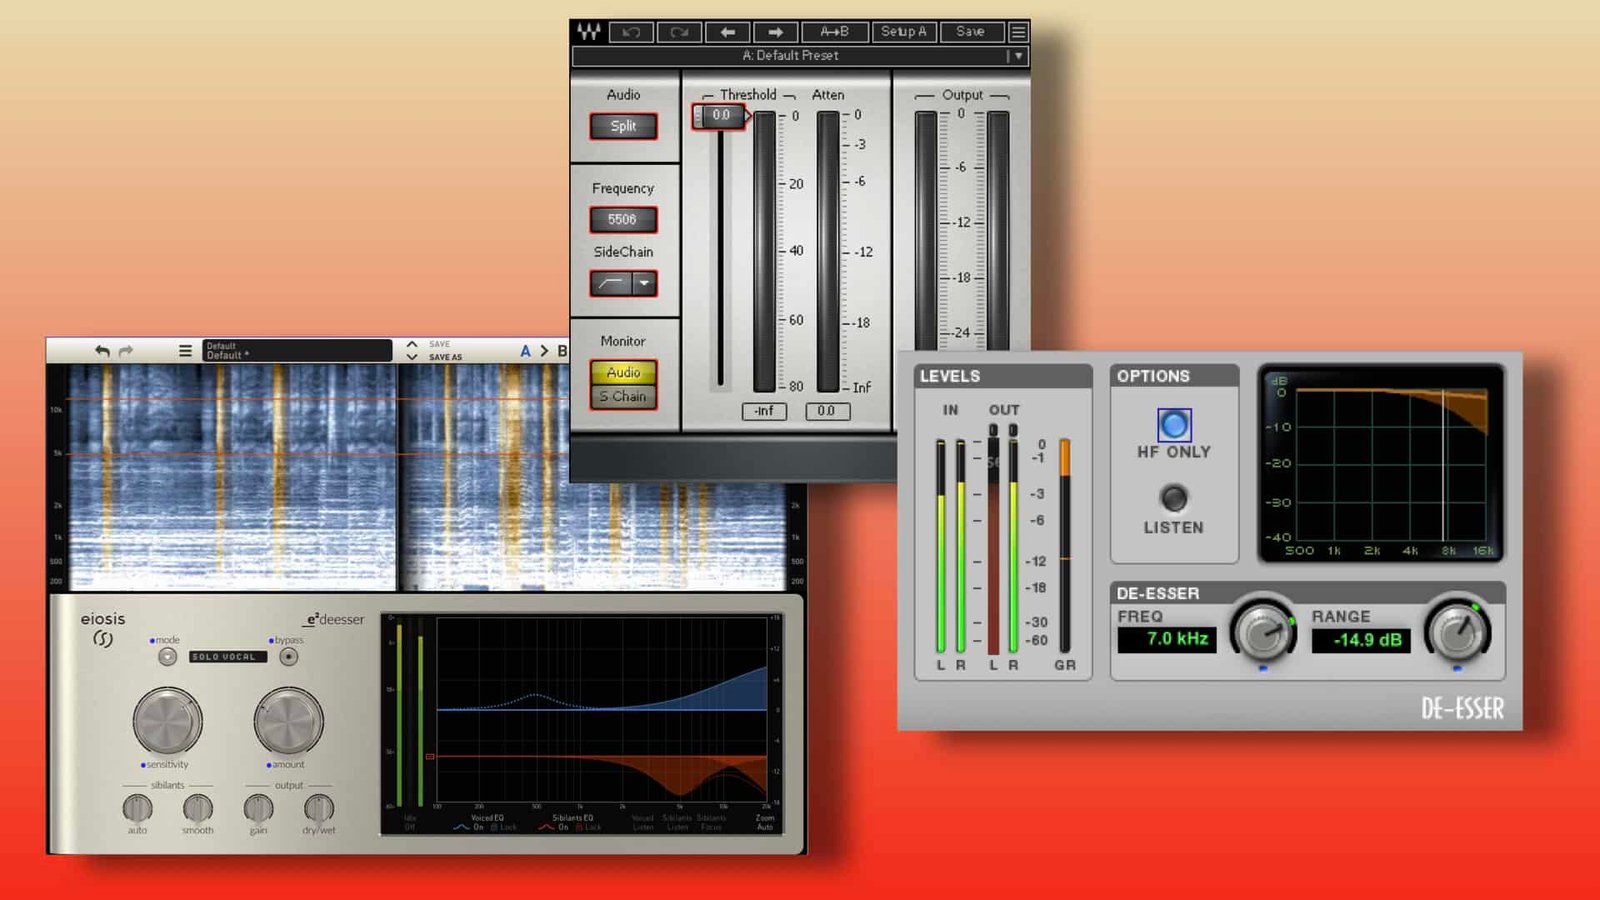
Doing this manually can take time, a lot of time! But there are plugins and tools that can help you do this faster and more efficiently. Waves DeBreath, for example, is one of the best tools for cleaning up breaths in vocal recordings.
ℹ️ You use pro tools? You want to learn more about noise cleaning? You will find all the information you need on this article on How To Clean Vocal Breaths In Pro Tools
2. Tuning
Nowadays, quality tuning is important to get a professional sounding vocal mix. And it’s even more important in more popular genres such as pop, rap, or electro music (although there are many others).
Before I go further into this point, I’d like to point out that tuning does not always mean auto-tuning, contrary to what many people think. Indeed, pitch tuning is a general term and can refer to either manual tuning or automatic tuning (auto-tune).
A. Manual Tuning
Manual tuning is generally used to achieve accurate and natural pitch processing. The purpose of this kind of tool is to avoid the listener noticing the presence of pitch modification.
Manual tuning is much more time consuming than auto-tune, as it involves working on each note of the vocals, syllable by syllable. It also sometimes requires a lot of attention to note transitions, which can quickly sound unnatural if not worked on properly.
Work should also be done on the formant of the vocals. Indeed, by increasing or reducing the pitch of a note, the formant is always modified. It will then always be necessary to readjust it accordingly to obtain the best results.
B. Automatic Tuning
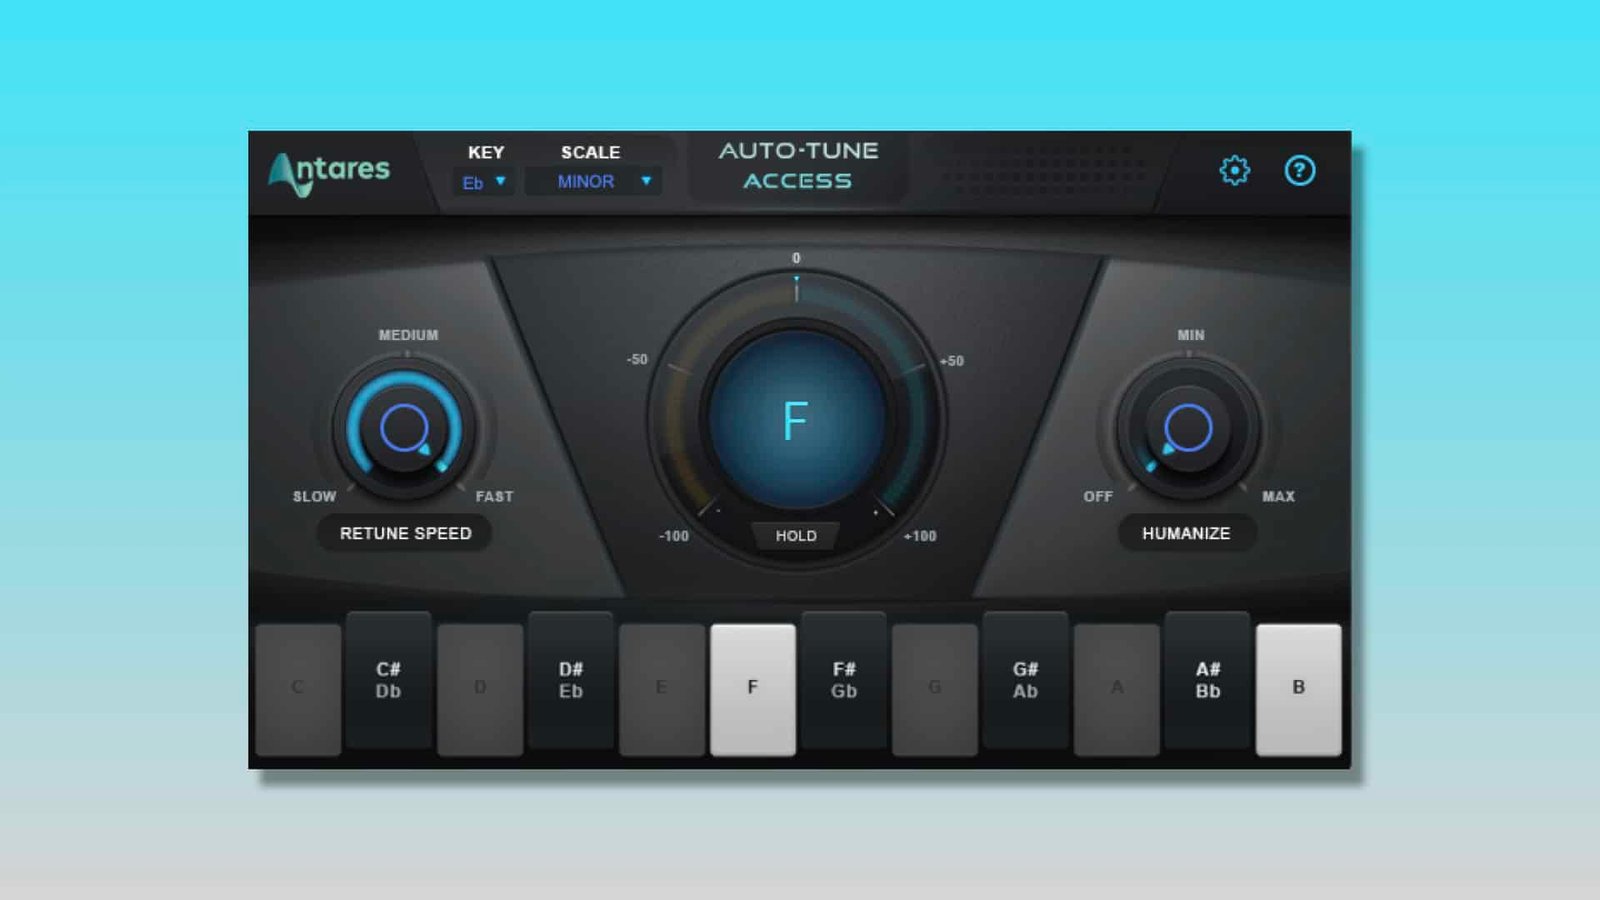
Auto-tune, or automatic tuning, will be used more often to get a more robotic and less natural color and tone. This is often something that we can find in hip-hop music, for example.
Auto-tune is a much faster tool to set up. You just have to open the plugin you need, to choose the key adapted to the song, to adjust some parameters, and it’s done. Your vocals will be tuned automatically, in real time.
Thanks to the very advanced technology of the auto-tune actuals plugins, it is possible to process the pitch of the vocals very subtly, even if the processing is automatic. Here are some typical retune speed values that will help you make decisions faster:
- From 0 to 10ms: Robotic
- From 15 to 30ms: Noticeable but subtle
- From 40ms: Natural
ℹ️ If you want to learn more about how to use auto-tune on rap vocals, this article is definitely for you: How To Use Waves Tune Real-Time On Rap Vocals
To achieve natural but accurate vocal tuning, the best technique is to first process the pitch through a manual tuning plugin such as Melodyne. Then, only after this processing, apply a light auto-tune to make the pitch even more precise in the notes.
This is a combination that is often used in pop music. A genre in which, generally, auto-tune is not necessarily banned, but should not be too audible.
Recommended plugin: Slate Digital MetaTune
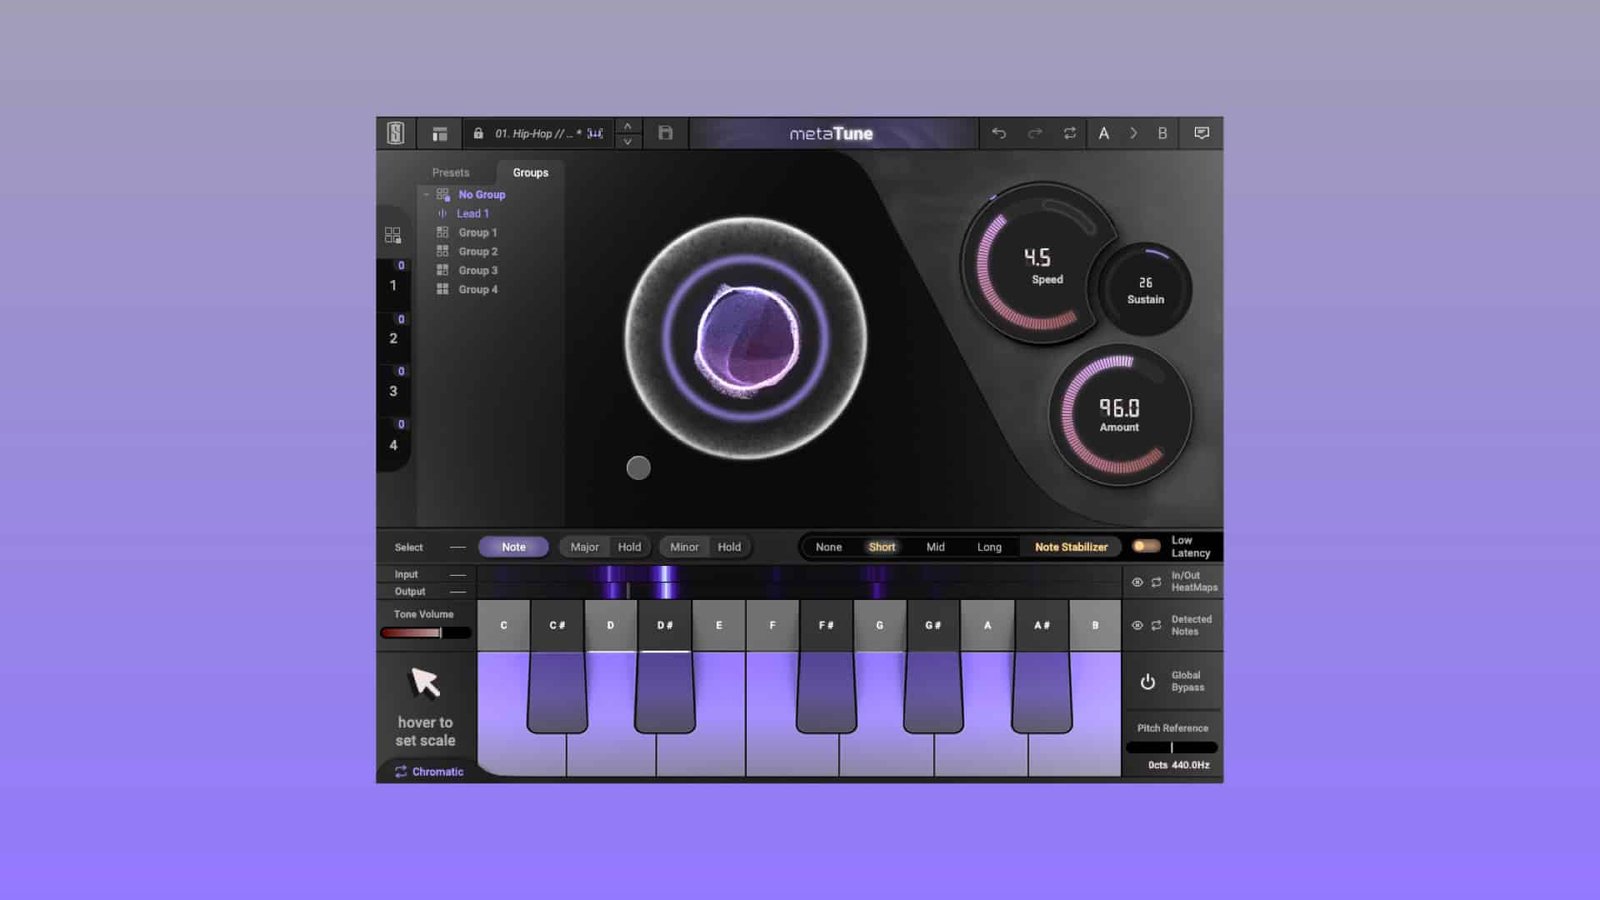
MetaTune is an auto-tune plugin from Slate Digital that was released fairly recently on the market. Its overall quality easily competes with the biggest in the business such as Antares.
ℹ️ Its few unique features and its audio rendering make this plugin a high quality auto-tune, which can be used by pros as well as amateurs. I let you discover it by yourself in this article on MetaTune | Why This Plugin Might Become a New Industry Standard
3. Dynamic compression
In any vocal recording, whether pro or amateur, there will be a certain dynamic range. As a reminder, dynamic range is the difference between the loudest and softest levels of an audio signal.
This dynamic range is often disturbing in music mixing, and especially in vocal mixing. Because it forces the mixer to do a lot of very precise and complicated volume automation to always keep the vocals in the foreground. Believe me, this is not the best plan!

Why use a compressor?
The best solution will be to use a compressor. Because the compressor will reduce the loudest levels above a certain threshold, and then raise the overall output level to the same level as the input.
Compression has two advantages:
- The first is that it will maintain a level evenness on your vocals throughout the song. This will prevent them from being masked by the rest of the mix when the signal was initially weak.
- The second is purely practical. By getting a unified level on the vocals, you avoid any level jumps for the rest of the processing. Which, as you will see, is essential.
The simple fact of compressing also has an impact on the frequency rendering of the vocals. If you choose the right compression settings, you will indeed get warmer and cleaner vocals. They will fit more easily into the mix.

How to use compression on vocals?
At this stage of the process, the goal, as mentioned in the previous paragraph, is to control the dynamics of the vocals. With this in mind, you should not be afraid to choose extreme/drastic values.
- For the threshold level, make sure you set it to the most appropriate level. The goal is not to work on the whole signal, only on the loudest levels. There are no standard values for a threshold level, as it will always depend on the level at which you recorded the vocals. But the reference point should always be the level jumps.
- The ratio chosen will always depend on the overall dynamics of the vocals. If the dynamics are large, the ratio should be higher, but if the dynamics are smaller, then a lower ratio is appropriate! I advise you not to choose too high values. The goal is not to kill the dynamics, but to control them. Ideal values are often between 2.5:1 and 4:1.
- For the attack time, I recommend something very short. The values will usually vary between 1 and 5ms. Generally speaking, a shorter attack time will be more suitable for softer vocals (I know, it’s counter-intuitive). Because fast compression will prevent slight transients from « breaking up » the smoothness of the vocals. On the other hand, a slower attack time will be more suitable for faster vocals (rap, for example) to accentuate the punchy and snappy side.
- For the release time, you should also choose rather fast values to avoid any pumping effect, which would damage the natural dynamics of the vocals. Anything between 25 and 50ms is to be preferred. It’s up to you to listen to the effect on the vocals to choose the best possible values.
Recommended plugin: Waves RCompressor

If you know me as a mixing engineer, you probably know that I love this plugin! It’s extremely intuitive and easy to use, but also efficient and very versatile. On top of that, you can use the quality presets provided by Waves to make mixing decisions.
You can also choose what kind of compressor you want to imitate through the RCompressor. It’s pretty subtle, but it really does work!
4. Subtractive equalization
It’s time to clean up unnecessary or disturbing frequencies! At this stage of the process, you should make sure that the frequency spectrum of the vocals is as clean as possible for the rest of the process.
Indeed, not cleaning vocals can sometimes create big problems for the rest of the processing. This is because some tools further down the chain can bring out frequency problems (if they are any).

« Classic » filters
- High-Pass Filter in the bass range: No matter how good the vocal recording is, you will always have a slight rumble in the low end. Even though it is usually very subtle, it is important to cut it out to avoid unpleasant surprises. You can usually set the frequency of your high-pass filter to 100 Hz. And even higher for female voices.
- Slight Cut in the low-mid range: Around 200 Hz (between 150 Hz and 250 Hz), there is often an excess that is important to cut to avoid making the vocals muddy and inaccurate.
Others Filters
- Do the vocals sound boomy? Some vocal recordings can sometimes bring out a kind of boominess in the voice. This is either due to the singer himself or to the size of the recording space (too small). If this is the case, cut even more around 150-200Hz.
- Do the vocals sound boxy? Sometimes you can get the impression that the vocals sound as if they are locked in a box or in an old speaker. If this is the case, I recommend that you cut the frequency range around 700-800 Hz.
- Do they sound nasal? A classic problem in vocal mixing is nasal voices, as if the singer/rapper was singing from the nose (to illustrate the example, of course). If this is the case, then cut the frequency range around 1.5-2 kHz.
- Do the vocals sound aggressive in your ears? Some mics amplify the aggressiveness of the vocals. You can feel something very sharp attacking your ears, which is not pleasant for anyone. If you feel this aggressiveness in the vocals, then I advise you to slightly cut the frequency range around 5-6 kHz.

Resonant frequencies
In vocal recordings, you often find some harsh resonance frequencies. These are very specific (and stable) frequencies that stand out from the general spectrum in an aggressive way and can become unpleasant for the listener.
The source of these resonant frequencies is multiple: the recording room, the microphone, or sometimes even the voice itself. Whatever the source, the problem is always the same to identify and solve. And here’s what to do:
Be careful, this process can be dangerous for your tweeters and your ears. Before you do this technique, which is called sweeping eq, make sure to turn down your listening level, especially if you are working with headphones.
- With a full parametric EQ, choose a band around the resonant frequency you hear. And turn up the Q all the way.
- From there, increase the gain by a few dB. You should end up with a sort of spike pointing upwards.
- Then you just have to scan the frequencies around it and identify the ones that resonate (very aggressively).
- Did you find the critical frequency? Great! Now reduce it by a few dB, until you don’t hear it at all. Don’t hesitate to switch this band on/off for comparison.
This technique is very practical and allows you to get rid of unpleasant frequencies quickly and efficiently. But don’t overuse this principle, you should only use it if you hear frequencies that are quite obviously aggressive to your ears.
Recommended plugin: FabFilter Pro-Q 3

When it comes to subtractive EQ, Pro-Q 3 is probably the best option for maximum efficiency in your workflow. With this plugin, you literally have everything at your disposal to work with incredible precision.
You also have the possibility to make each band dynamic and to make them react according to the gain of the processed frequency area. Really, a great plugin!
It’s not the most affordable plugin on the market, but it’s definitely worth the investment. Because this plugin will allow you to do high quality frequency cleaning!
ℹ️ Want to discover the best alternative plugins to Pro-Q 3? Everything you need is in this article: Top 9 Alternative Plugins To FabFilter Pro-Q3 (Free & Paid)
5. De-essing
When recording vocals, you have probably already noticed that some sounds stand out more than others, especially with sounds like « s », « t », « ch », « f » or even « v ». These are called sibilances.
These are sounds that, in a human speech, are more powerful than the rest of the speech. They usually occur in the frequency range between 6 kHz and 10 kHz.
To clean up these sibilant sounds, don’t use a simple EQ! Because you will also get rid of the other interesting sounds in this frequency range. This is not what we want!
You actually have to use a dynamic tool that reduces the power of this critical frequency area only when it reaches a certain threshold level: this is the role of a tool called the de-esser.
In other words, the de-esser will allow you to get rid of the sibilant sounds without damaging the rest of the frequency spectrum. This is very useful in vocal mixing!
How to use a de-esser?
Among all the mixing tools that exist today, the de-esser is probably the one that seems to be the simplest. However, it requires a lot of precision. Because a mistake in de-essing can completely ruin your vocals.
Here is how to proceed to get the best results:
- Identify the critical frequency zone: Sibilant sounds differ in each vocal you record. Some are very localized, some are broader, some are lower in the spectrum, some are in the high frequencies. It’s up to you to try to spot where it is necessary to apply a de-esser. It should generally be set lower for male voices than for female voices.
- Adjust the threshold level: Once you have identified the critical frequency area, you must now identify the level at which the sibilance becomes aggressive. Many plugins offer you visual support for this, but trust your ears.
- Choose the gain reduction: The last important step is to determine how much you want the sibilance to be reduced when it reaches the threshold level. Here you have to choose a happy medium. Too little, and the sibilance will continue to be annoying. Too much, and you’ll feel like you’re dealing with a lisping singer. Always try to get close to something you would like to hear in real life.
Recommended plugin: Waves Sibilance
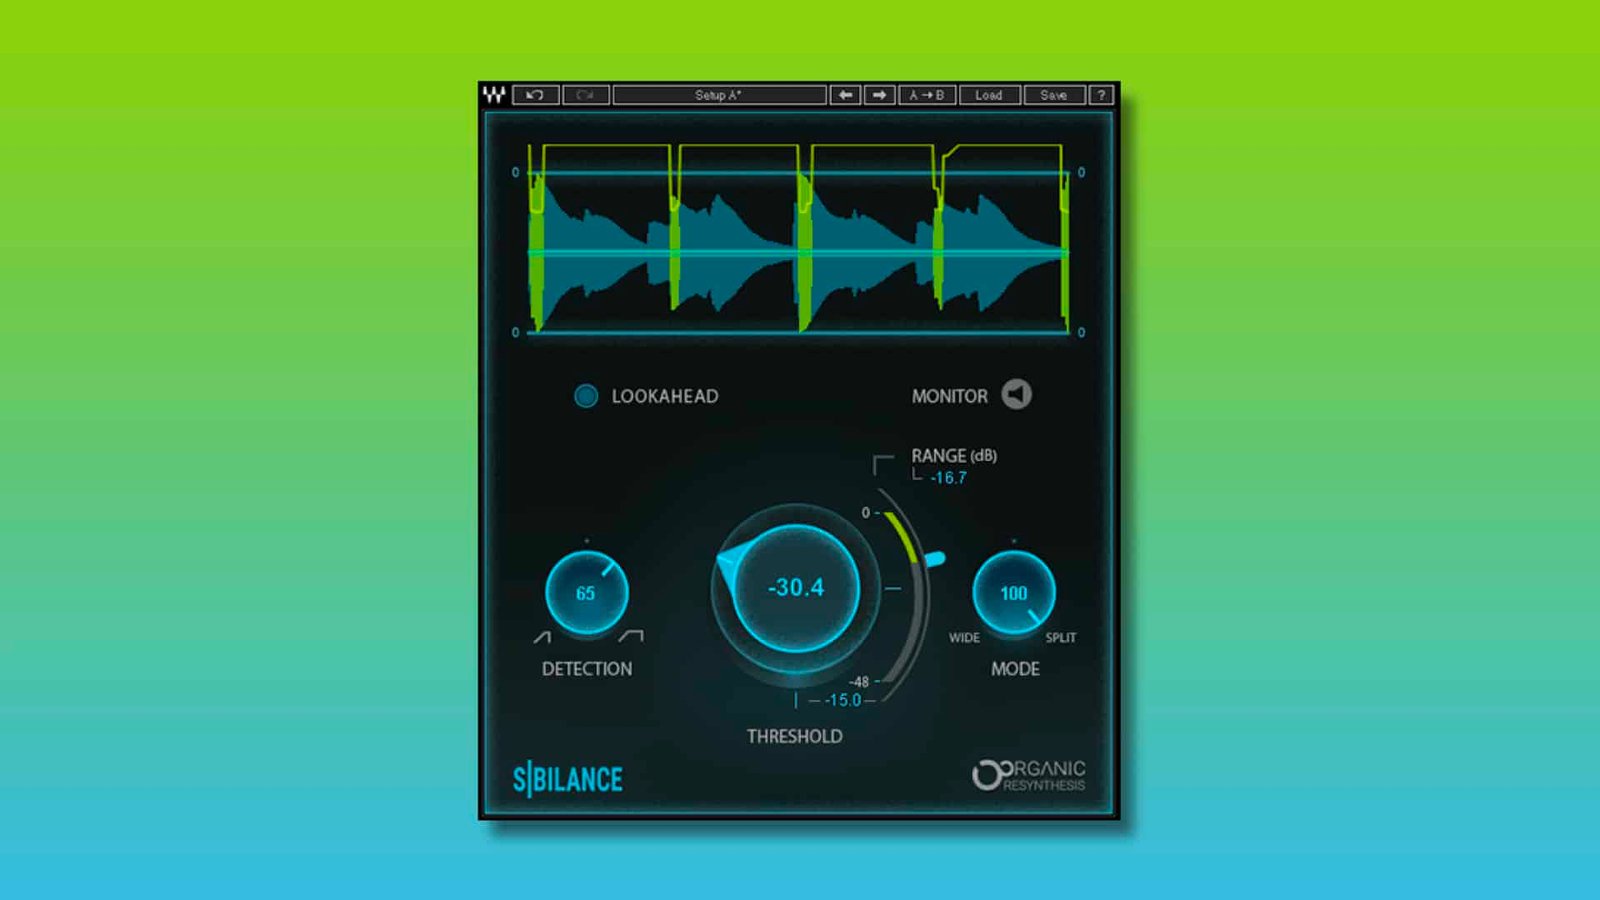
There are a lot of great de-essing plugins on the market these days. But I find Waves Sibilance to be one of the most effective of all. And most of all, it’s very intuitive.
This plugin also has something more than all the others. It uses the Organic Resynthesis engine which allows you to avoid any kind of glitch and keep the organic side of the vocals. It works great!
A this stage of the process…
At this stage of processing, you should have clean, robust, consistent vocals. Which is already a good thing.
But now it’s time to make them more exciting! Because let’s not forget that mixing music is also about making each track more attractive, exciting and captivating.
That’s exactly why, after cleaning up the vocals in terms of dynamics and frequencies, you need to add some spice!
Let’s take a look at how we can achieve this more exciting result.
6. Additive equalization
The first way to make vocals more exciting is to work on the frequency spectrum. Here, instead of reducing certain frequency zones, we will boost them!
Before we get into this point, it is important to point out that boosting should not be overused in vocal mixing. Mixing is like cooking. Here, we are at the seasoning stage. It is the final touches that take the vocals from good to great quality. But don’t forget: too much seasoning can ruin your dish!
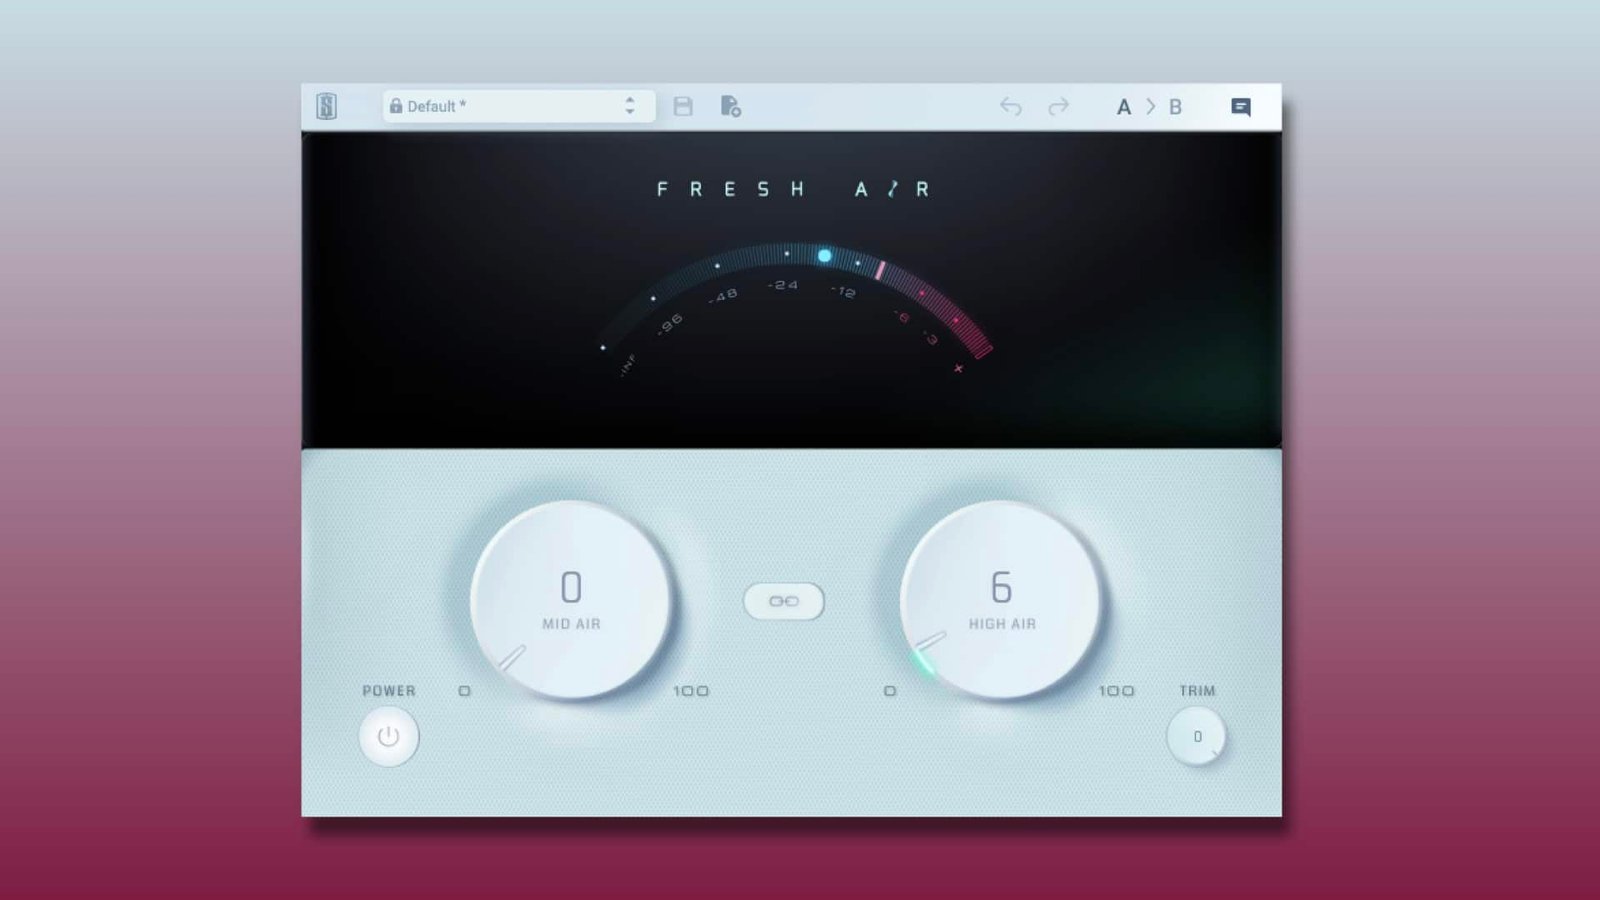
Add air to vocals
A first way to make vocals more exciting with an EQ is to boost the air zone. This frequency range represents everything above 12 kHz.
For this processing, I recommend using a high-shelf filter, which will allow you to work the boost on all frequencies above the chosen frequency. With a simple bell filter, you might miss out on all the air in the upper part of the spectrum.
By boosting this entire area of air, you’ll be able to enjoy more open, brighter, airier, and more exciting vocals! And if the rest of the instrumental is mixed correctly, you’ll also get the feeling that the vocals will blend more easily with the rest of the mix.
Some plugins are designed for this kind of purpose (Fresh Air, for example) and work brilliantly. But you can also do this kind of processing with « classic » free EQs.
Add Warmth to vocals
Thin vocals can be something that quickly prevents the listeners from having a feeling of closeness with the singer/rapper.
That’s why it’s important to maintain some kind of warmth in the vocal spectrum. And the frequency range that can bring out the warmth of the vocals is often around 100-120 Hz.
To do this the right way, use a wide Q band and boost around 100-120 Hz. Usually 1 or 2 dB is enough to get the « perfect » result. It is important not to go too far.
Depending on the vocals and the gender of the singer/rapper, this zone will sometimes be higher or lower. It’s up to you to listen and feel where the warmth is!
Add presence to vocals
In music, when there are vocals, they are often there to be brought to the forefront. This is especially the case in the more popular genres of music such as pop or hip-hop.
With this in mind, it’s important to find effective ways to keep the vocals from being masked by the rest of the instrumental. There is compression, volume boost, but there is also the range of presence of the EQ that can come into play.
This area, between 3 kHz and 6 kHz, is responsible for the distance perceived by the listener. The more you boost this range, the more a feeling of closeness and proximity will be felt in a « natural » way.
In other words, this frequency range allows the vocals to cut through the mix to stay in the foreground throughout the song.
Keep in mind that this is a very sensitive area for the human ear. As with all vocal processing, don’t go too far with the boost!
Recommended plugin: Slate Digital FG-S (Virtual Mix Rack)

The FG-S is a module of Slate Digital’s Virtual Mix Rack that emulates a slice of the legendary SSL mixing console. It is an EQ for boosting. Because it gives you a unique SSL tone and coloration.
Boosts in the high end of the spectrum will give you a shiny result, boosts in the low end of the spectrum will bring out an uncommon warmth and the midrange knob will quickly bring out the vocals in the mix, even with a slight boost.
7. Tonal compression
Earlier in this article, we talked about compression as a tool whose purpose is to reduce the dynamics of an audio signal. This is true, but it is not the only purpose of a compressor.
Used in a certain way and with the right tools, compression can also give a certain tone to the source, which can sometimes be very different from the original. This is why engineers and producers call it the tonal compression.
Why use tonal compression?
When vocals are recorded without significant processing. They often sound flat and unexciting. This is exactly what tonal compression will solve. By adjusting the compression settings correctly, you can give your vocals an impressive punch and character.
Your vocals will also sound indirectly closer and brighter than without tonal compression.
You will also see in the next point that certain types of compressors such as FET or optical compressors can add a slight saturation that is often appropriate for vocal mixing. This gives a unique character.

How to use tonal compression?
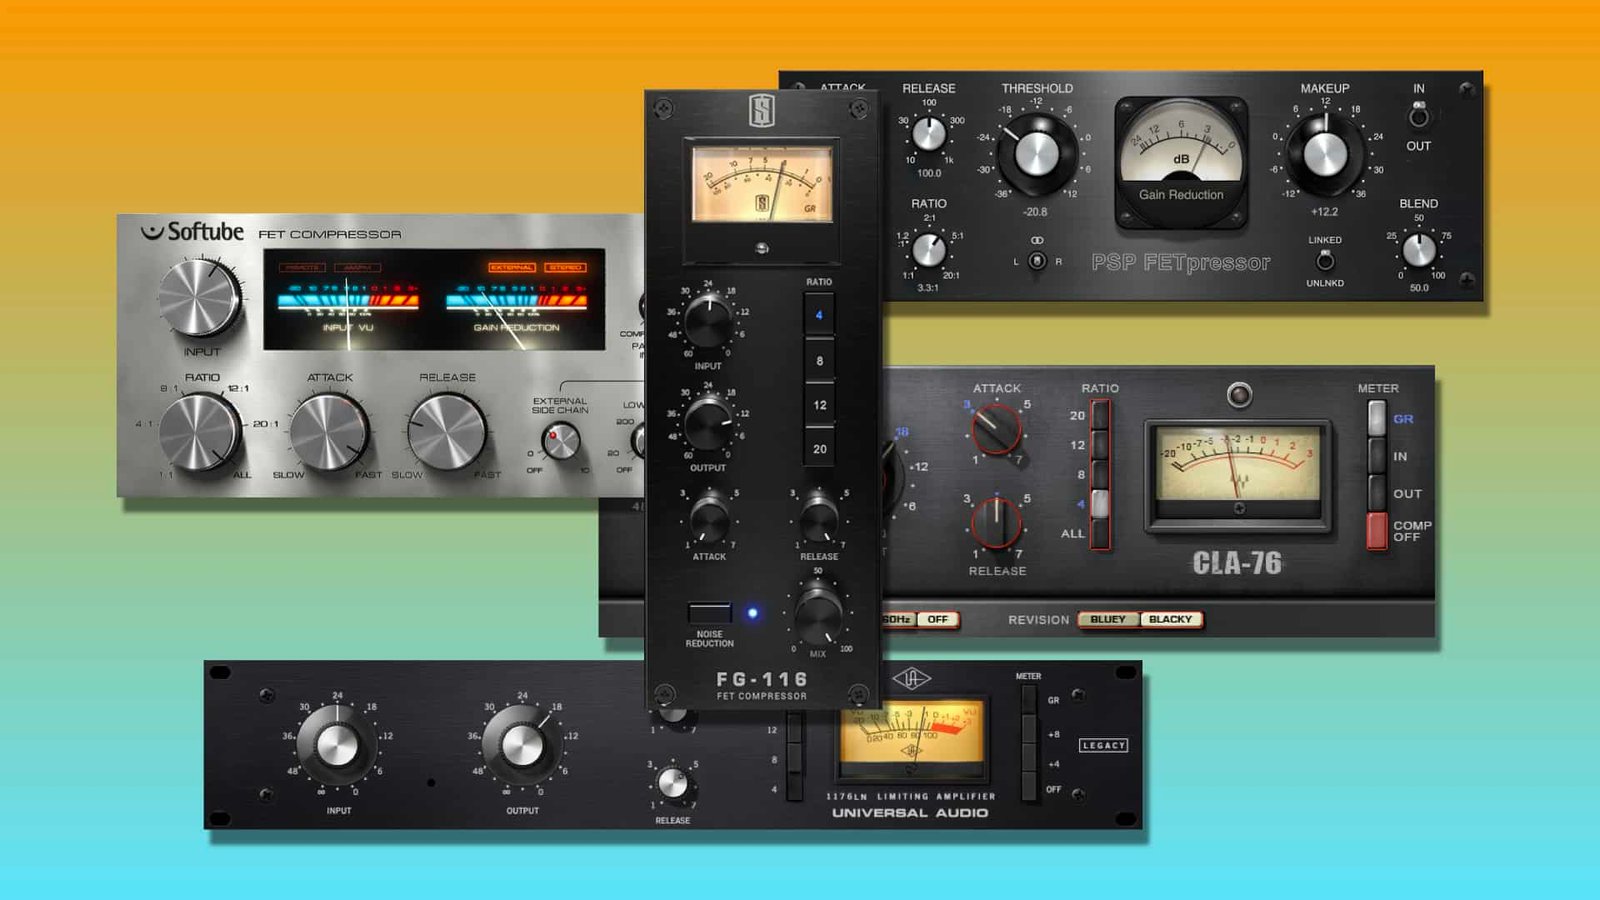
The first thing to know is that it is always more efficient to use tonal compression with plugins made for it. The best example of this is the FET compressors. This type of compressor colors any incoming source, even when it is not compressing. It’s just super great!
For this type of compression, it is essential that you « go in » a little bit in the dynamics to really enjoy the tone coming from the compression. In other words, even the » medium » levels should ideally be compressed, not just the loudest levels, as was the case with purely dynamic compression.
In the case of tonal compression, you should always keep in mind that the vocals have to be « more lively », which is why the values will be slightly different this time:
- Fast attack time but still lets the transients of the vocals escape to enjoy more punch.
- Medium release time, to make the compressed side felt without bringing out a pumping effect.
As for the ratio and threshold, it will depend a lot on the original dynamics of the vocals. Just keep in mind that the average reduction gain should be around -3 to -5 dB. If you see your VU needle turning around this area, you should’ve chosen the right values!
Recommended plugin: Waves CLA-76
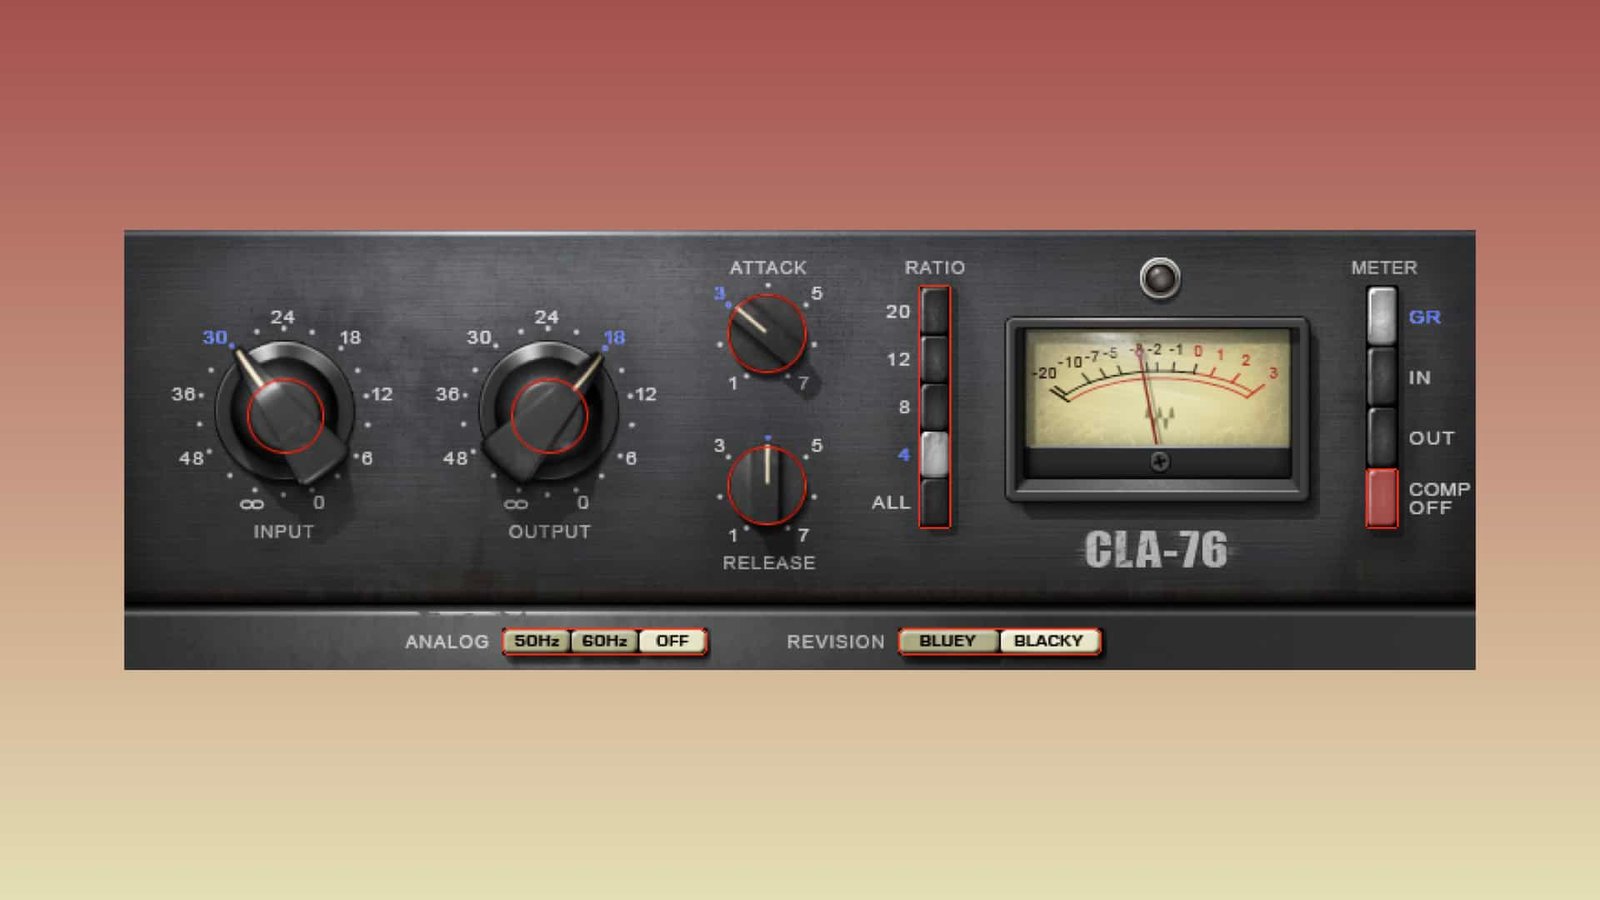
Waves CLA-76 is an emulation of Universal Audio’s legendary FET compressor: the 1176. And among all the emulations available on the market (there are many), I find it the best for everything related to tonal compression.
Why is this? Because it’s the one that brings out the « saturated » side the most. It gives a lot of character and punch to the vocals. And that’s exactly what we’re looking for at this stage of the process!
8. Effects (reverb and delay)
Time to add some reverb and delay to your vocals. This is without a doubt the most complicated part of the vocal mixing process. But I’ll give you some tips on how to do it the best way.
Use reverb and delay in auxiliary
Don’t make the mistake that many people make when mixing vocals, which is to use effects such as reverb and delay as an insert to the vocal track.
I have to be honest, it can sometimes work very well. But most of the time, choosing the insert doesn’t help you to get pro results.
Whereas by using the auxiliary principle you will enjoy the following advantages:
- Full control over the balance between vocals and reverb
- Maximum flexibility in reverb processing (especially frequency).
- A more organized session for more productivity and efficiency
ℹ️ If you want to learn more about why and how to use reverb in auxiliary, this article is made for you: Why And How To Use Reverb In Auxiliary?
Choose The Right Reverb
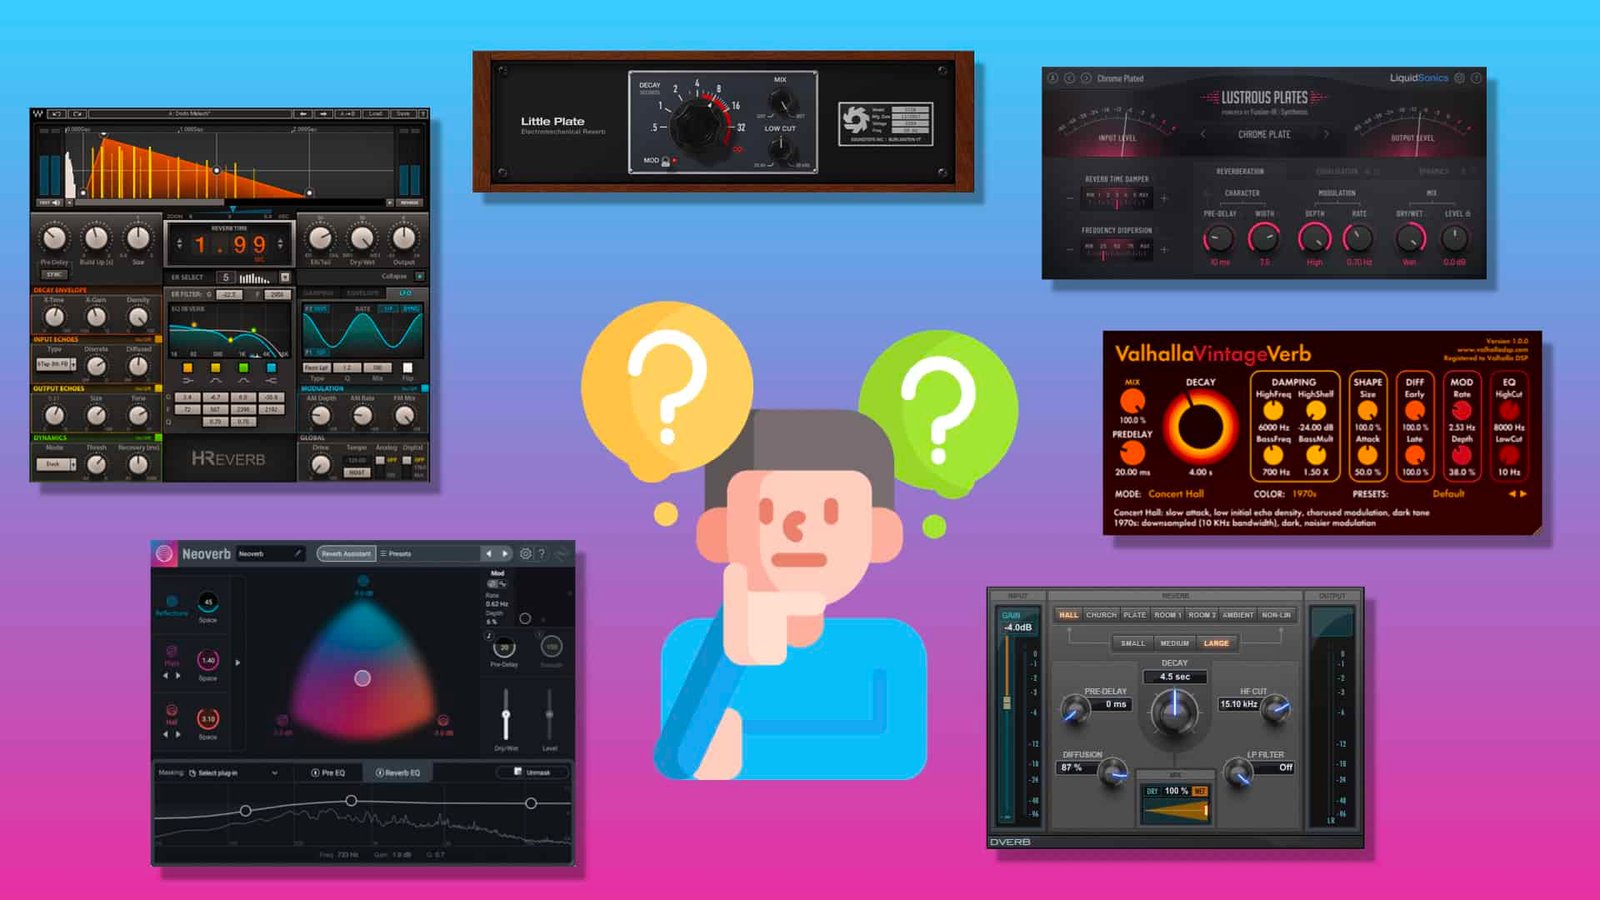
Choosing a reverb is often much more complicated than choosing a delay. The reason is simple: there are dozens of different types and styles of reverb. While delay plugins are often differentiated (with some exceptions) only by their features.
All this to say that adding reverb is not just a matter of getting the right mix of vocals and reverb. This is important, but first you have to choose the right reverb for the vocals.
ℹ️ In this perspective, I couldn’t recommend you more to read this article which will explain you How To Choose The Right Reverb For Vocals
Don’t limit yourself
Today, in the digital world, the limits are pushed further and further. However, I still see people every day who limit themselves very quickly in their creativity, especially with effects.
Don’t limit yourself to one reverb and one delay on your vocals. Most of the time, it takes more than that to make a professional vocal mix. So don’t hesitate to add one or more reverbs and delays.
The best way not to limit yourself in the effects of vocals is to prepare them in a template. In my mix template, for example, you can see that I already have some sends that are ready to be sent in several types of effects. This is a huge time saver.

Use automation
You want to know one of the main criteria that differentiates pro mixes from amateur mixes: automation tracking. I swear, it makes a huge difference, especially when it comes to effects like reverb and delay.
Don’t let your effects die through the song. Let them live. Make them sound exciting. Boost them, reduce them. In short, for the best results, you need to track every second of your song and make sure that all the effects sound the way you hear them in your mind.
It may seem trivial, but believe me, it makes a huge difference in the final quality.
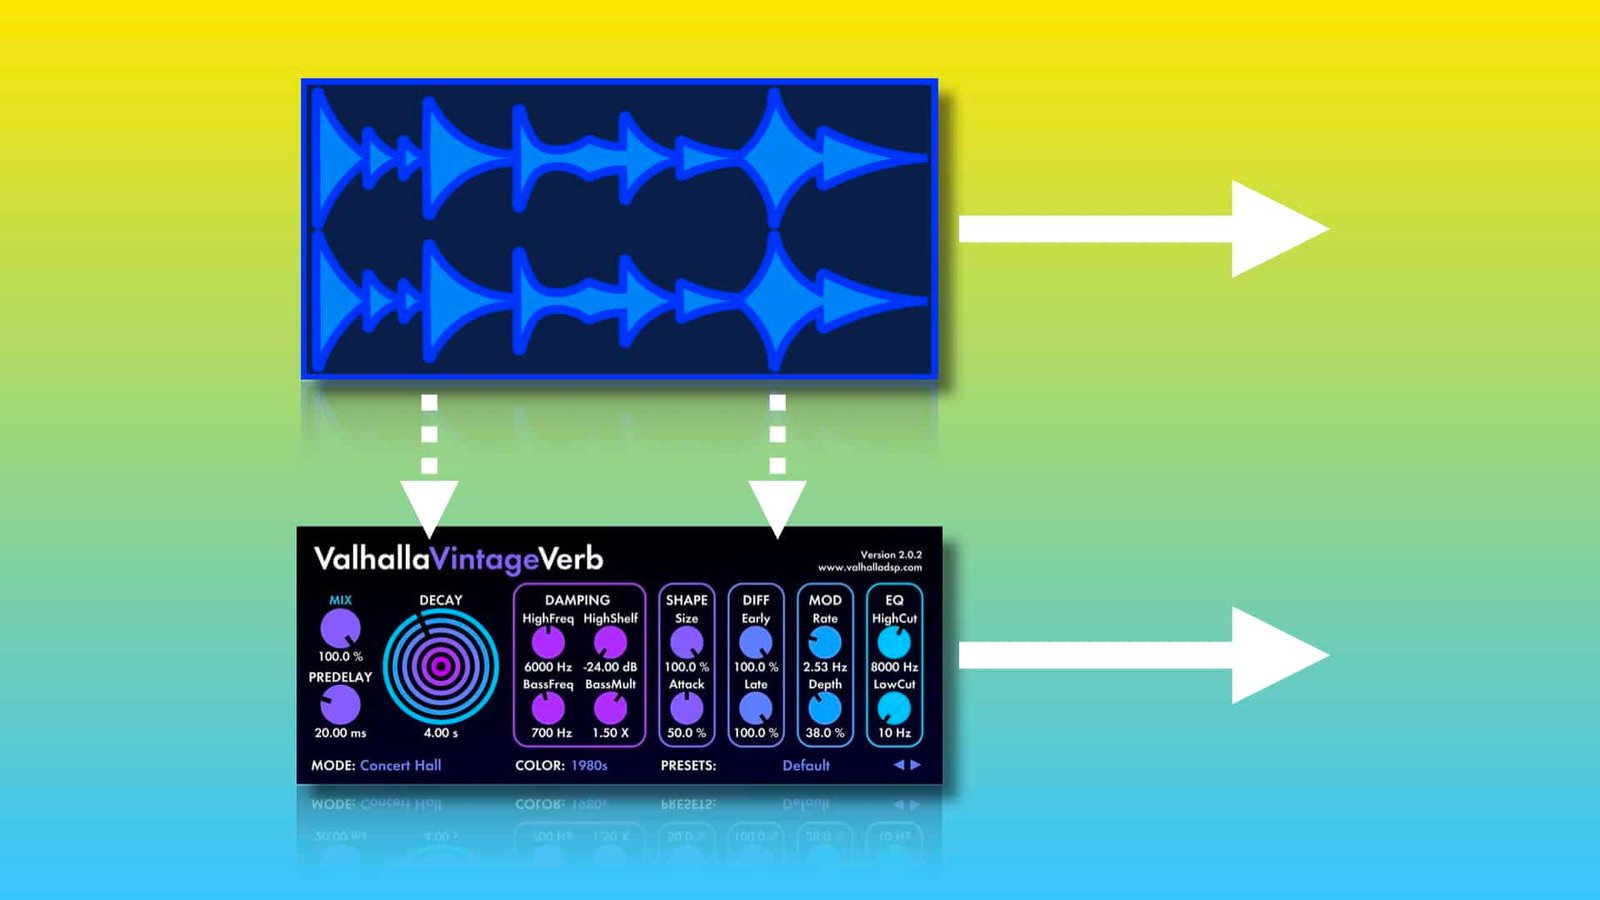
Recommended plugin: Valhalla VintageVerb
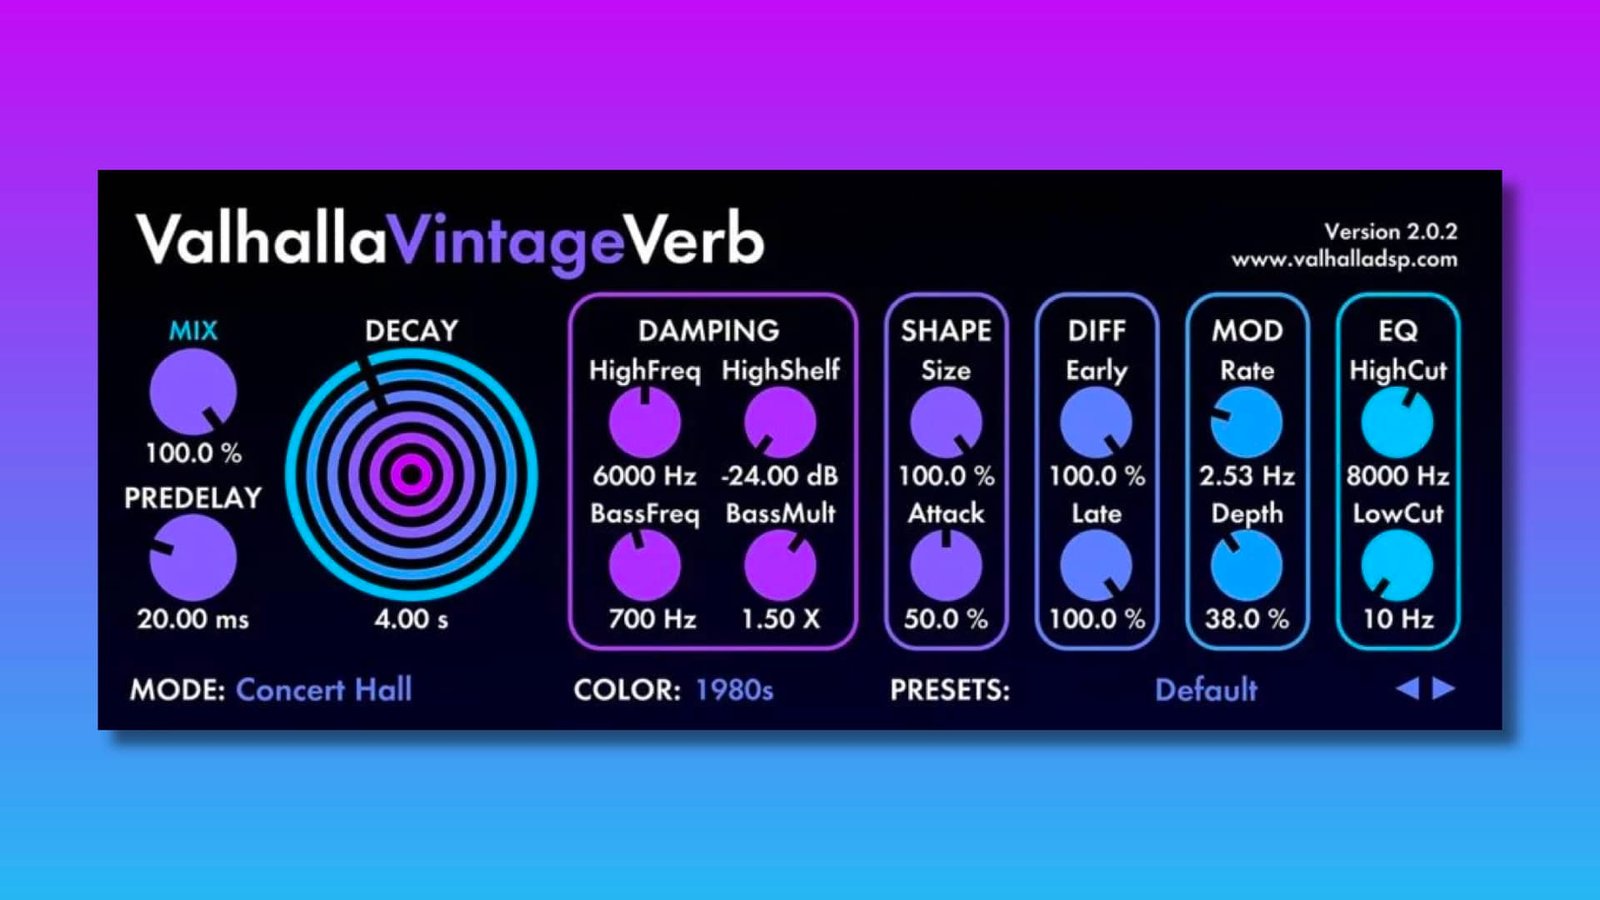
If you are looking for a good, versatile and efficient reverb at an affordable price, I can only recommend the Valhalla VintageVerb. In just a few years, this reverb has become a leader in the field.
With this reverb in your hands, you will be able to choose between many types of reverb, which you can adjust by era (70s, 80s,…) to give the perfect tone and color to your reverb.
Valhalla is a must have plugin for your library nowadays.
ℹ️ But this is not the only amazing reverb for vocals, they are many more on the market! You can discover all of them in this article: The 9 Best Reverb Plugins For Vocals In 2023 (Any Budget)
Want to go further?
This article represents the « classic » process of vocal mixing. It is the most efficient and the one that will allow you to get the best vocal mixing results. But…
You can go even further in the process! And use « professional » tools that will potentially push the quality of your mix even higher. If you use them in the right way, it can really be the little touch that takes your mix to the pro level.
Let’s be clear though, the tools listed below are only to be used if you are 100% sure you have mastered the processing steps described in this article. If not, I advise you not to concentrate on the part below.
A. Soft Saturation
Adding saturation to vocals is a fairly common technique in the professional world. By adding a light touch of saturation, it is possible to give a lot of life to vocals.
When properly adjusted, saturation can also add character, warmth, and for some types of saturation, incredible brilliance. Saturation can either be added as an insert or in parallel for more precise processing. But it is important not to overuse it, and above all, to choose the type of saturation adapted to the vocals.
ℹ️ If you want to know more about the principle of saturation/distortion on vocals, then I recommend you to read this article on How To Use Distortion On Vocals
B. Parallel compression
Parallel compression is an advanced mixing principle that allows you to blend two identical audio sources, one of which is heavily compressed, or even crushed.
This principle, often used on drums, vocals or even mix buses, is generally used to give a punch and character difficult to get with a simple compression.
ℹ️ Want to know everything about parallel compression? Then you just have to visit this article on Parallel Compression : Definition And Applications
C. Multiband compression

Using a compressor is a good thing! Using an EQ is good too. But what if you want to compress each frequency band of your vocals differently? That’s where the multiband compressor comes in.
A multiband compressor will indeed allow you to compress each frequency band of the vocals differently, more or less precisely depending on the tool. It can often be very efficient at the end of the chain to solidify your vocal mix.
Conclusion
In music mixing, nothing is more complicated than mixing vocals. But by following a systematic process that you apply in each of your mixes, you will be able to improve the quality of your vocal mixes more than you think.
These 8 steps of vocal mixing are the classic processing of vocals, but you are free to adapt them to your needs, your desires and your workflow. Anything that can potentially improve your workflow is good for you.
If you have any questions about vocal mixing or about anything in the field of music mixing, please make sure to contact me, I’m always very happy to help!
Related Articles:
My favorite tools for mixing pop and hip-hop music:
Plugins
In the field of auto-tune, I’m convinced that nothing’s better and more efficient than Antares Auto-Tune Pro. As for the EQ’s, FabFilter Pro-Q3 and Slate Digital Infinity EQ are, in my opinion, the best tools. For compression, I have 2 favorites plugins: Waves RComp and UAD EL8 Distressor.
As for reverb, I’m a big fan of the Soundtoys Little Plate, but generally, I go for the Valhalla VintageVerb for its versatility. I also love the Arturia Rev PLATE-140 and the UAD Pure Plate for its organic side.
Headphones
The closed headphones I love and will always love using for mixing pop and hip-hop music are the Beyerdynamic DT-770. As for the best open-back headphones, I use the Sennheiser HD600 headphones, and I’m really happy of them!
Monitors
Having a pair of Yamaha HS7 in its studio or home studio is always cool for more excitement while listening to your mixes. The Adam Audio T7V monitors are also super accurate. In my studio, I also have a pair of Genelec 8030 for their reliability.
Hardware gear
For anyone who wants to start using hardware in their mixes, I always recommend these 2 units from Klark Teknik: the EQP-KT and the 76-KT. Don’t forget to use good converters, such as the Apollo interfaces. This is essential for a good rendering.


